Week 8: CNC Milling, Molding & Casting
Table of contents
- I’ve always wanted ice-cubes in the shape of mountain ranges*
After some quick research I found this abomination of a ‘Mount Fuji’ ice-mold.

And a better one of Mount Everest that was $97. 
So this week I’m developing a process of making mountain-range ice-molds using CNC, 3D printing (unfortunately as CNC’s didn’t work out), and silicone molds.
Making mountain ice/chocolate/plaster-molds
Attempt 1: CNC Milling the negative
To 3D-model the mountain range, I first had to find some software or program that could give me some sort of an elevation map. There are two main sources to get easy 3D terrain models, Touch Terrain and Terrain2STL . I didn’t have much luck with Touch Terrain, however Terrain2STL worked quite well. All you had to do was input the coordinates of the mountain peak, adjust the latitude and longitude window that you wanted to include in the 3D model and then click ‘Generate STL’. The program would then generate a 3D model of the mountain range in STL format.
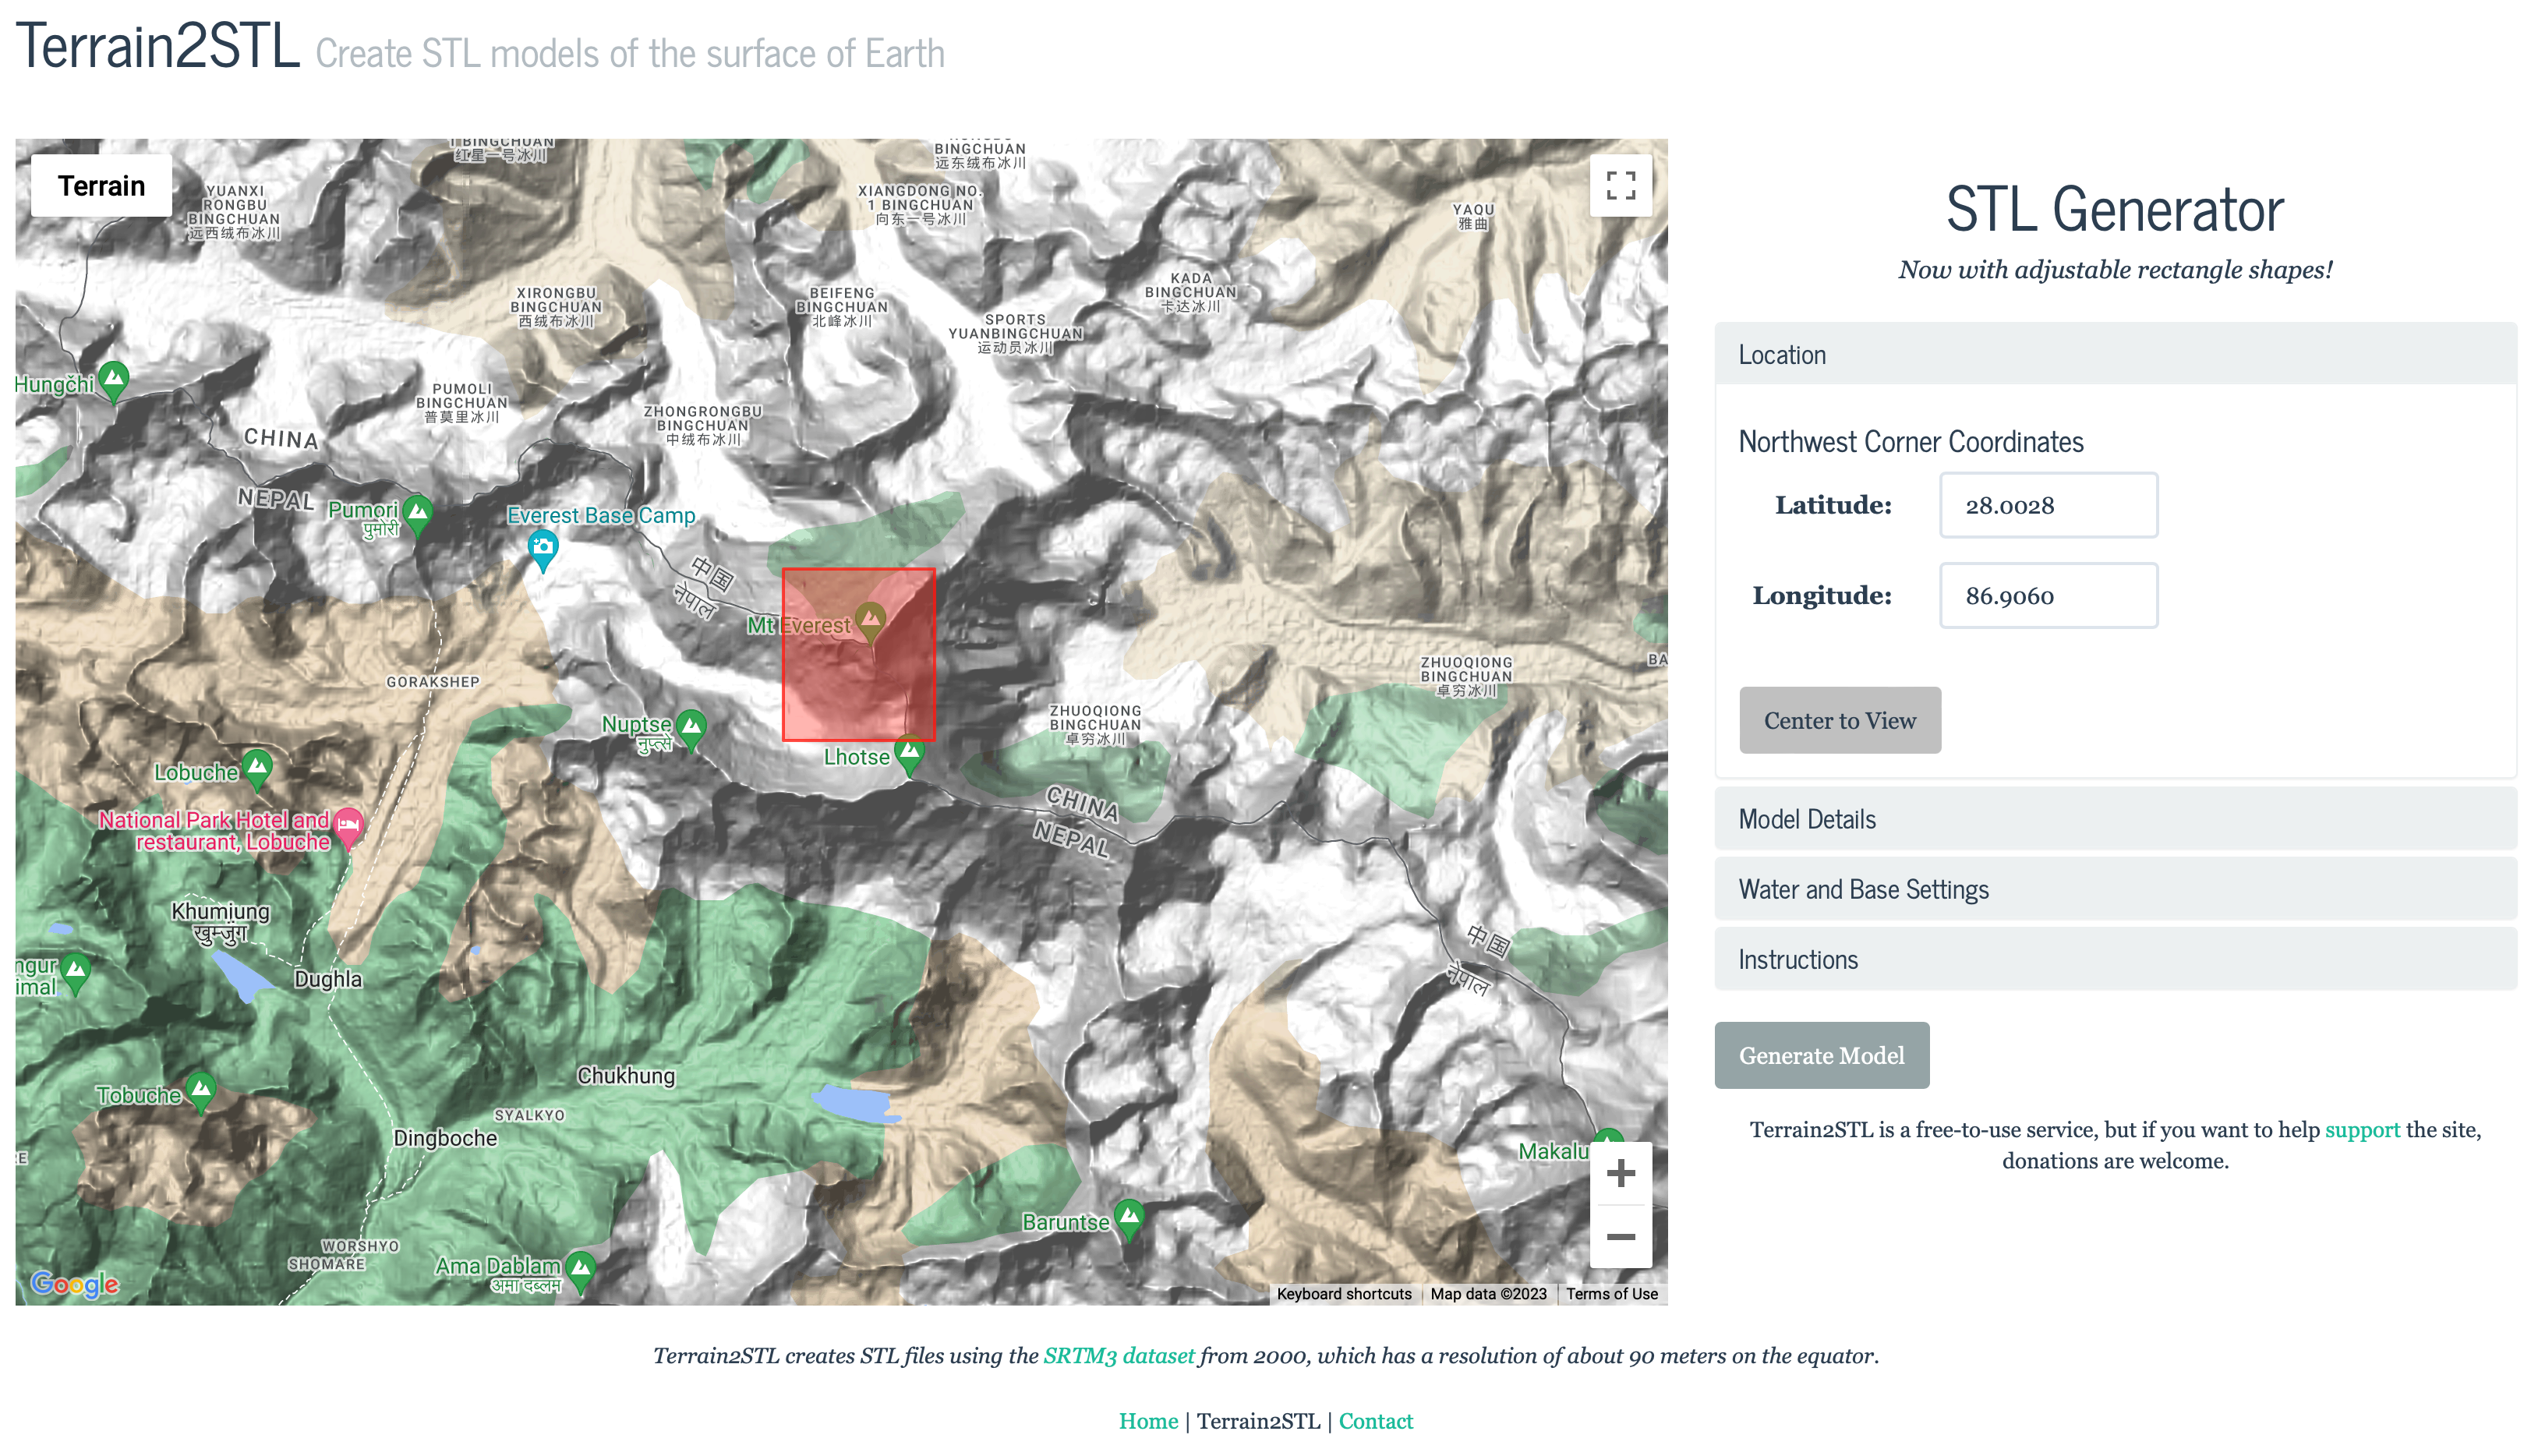
One setting that was important to adjust is the ‘Vertical Scaling’ setting, which would exaggerate the steepness of the mountain range. For most mountain ranges such as Mt. Fuji, the actual dimensions produces very flat and boring peaks, where alot of surface details are lost. By increasing the vertical scaling, the peaks become much more exaggerated and interesting.
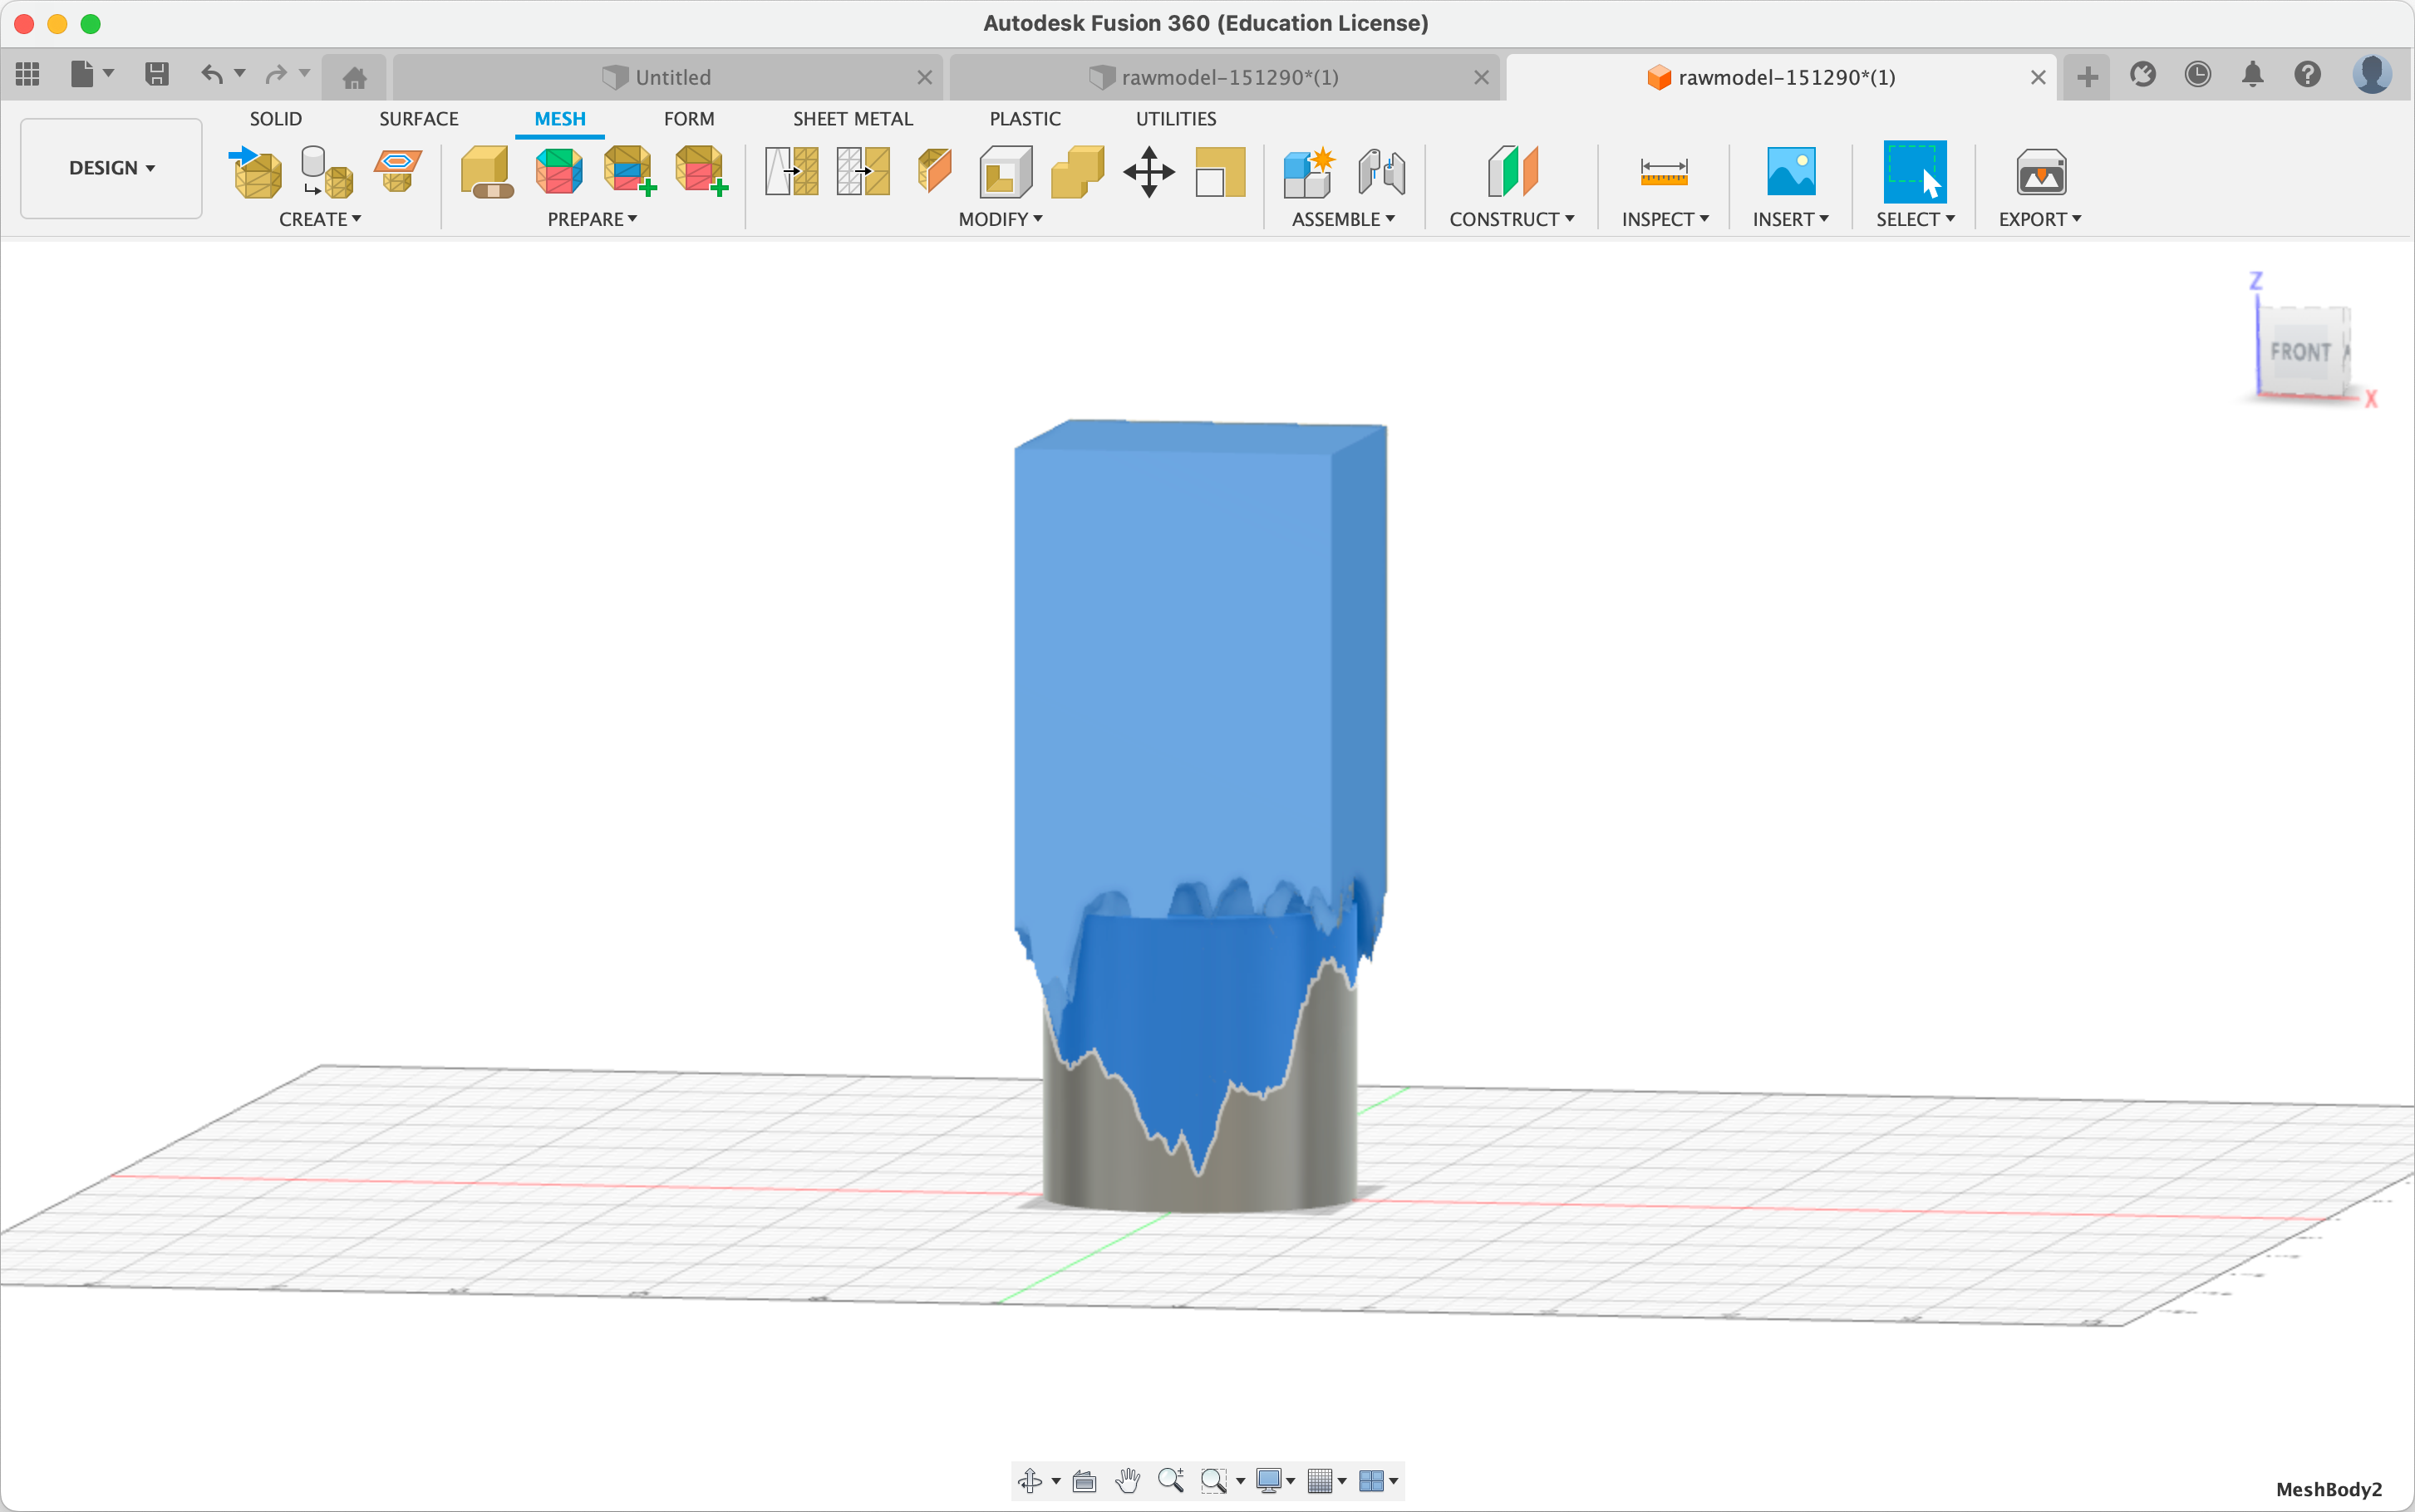
These files are directly imported and recognized by Fusion360 as “MeshBodies”, the only thing left to do is to add a base and a wall to the model. To do this we would first have to convert the MeshBody to a SolidBody, which can be done by selecting the MeshBody and clicking ‘Convert to Solid Body’ in the ‘Modify’ tab.
Beware! Converting the MeshBody to Solid Body would constantly crash the software, turning off Design History in Fusion360 fixed this
Note: In hindsight, converting to a solid is not optimal as it reduces the resolution of the object. It is technically better to convert the base and walls to mesh rather than what I did.
The negative model is made by creating a cylinder and using the ‘Combine’ function to subtract the mountain range from the cylinder. Shown below.
I tried CNC milling the negative, It worked pretty well after most of the way through, I realized that the negative is too deep for the bit and the rotor touched the wax. Also, that using wax as an ice-mold was not a smart idea.
Attempt 2: CNC Milling the positive
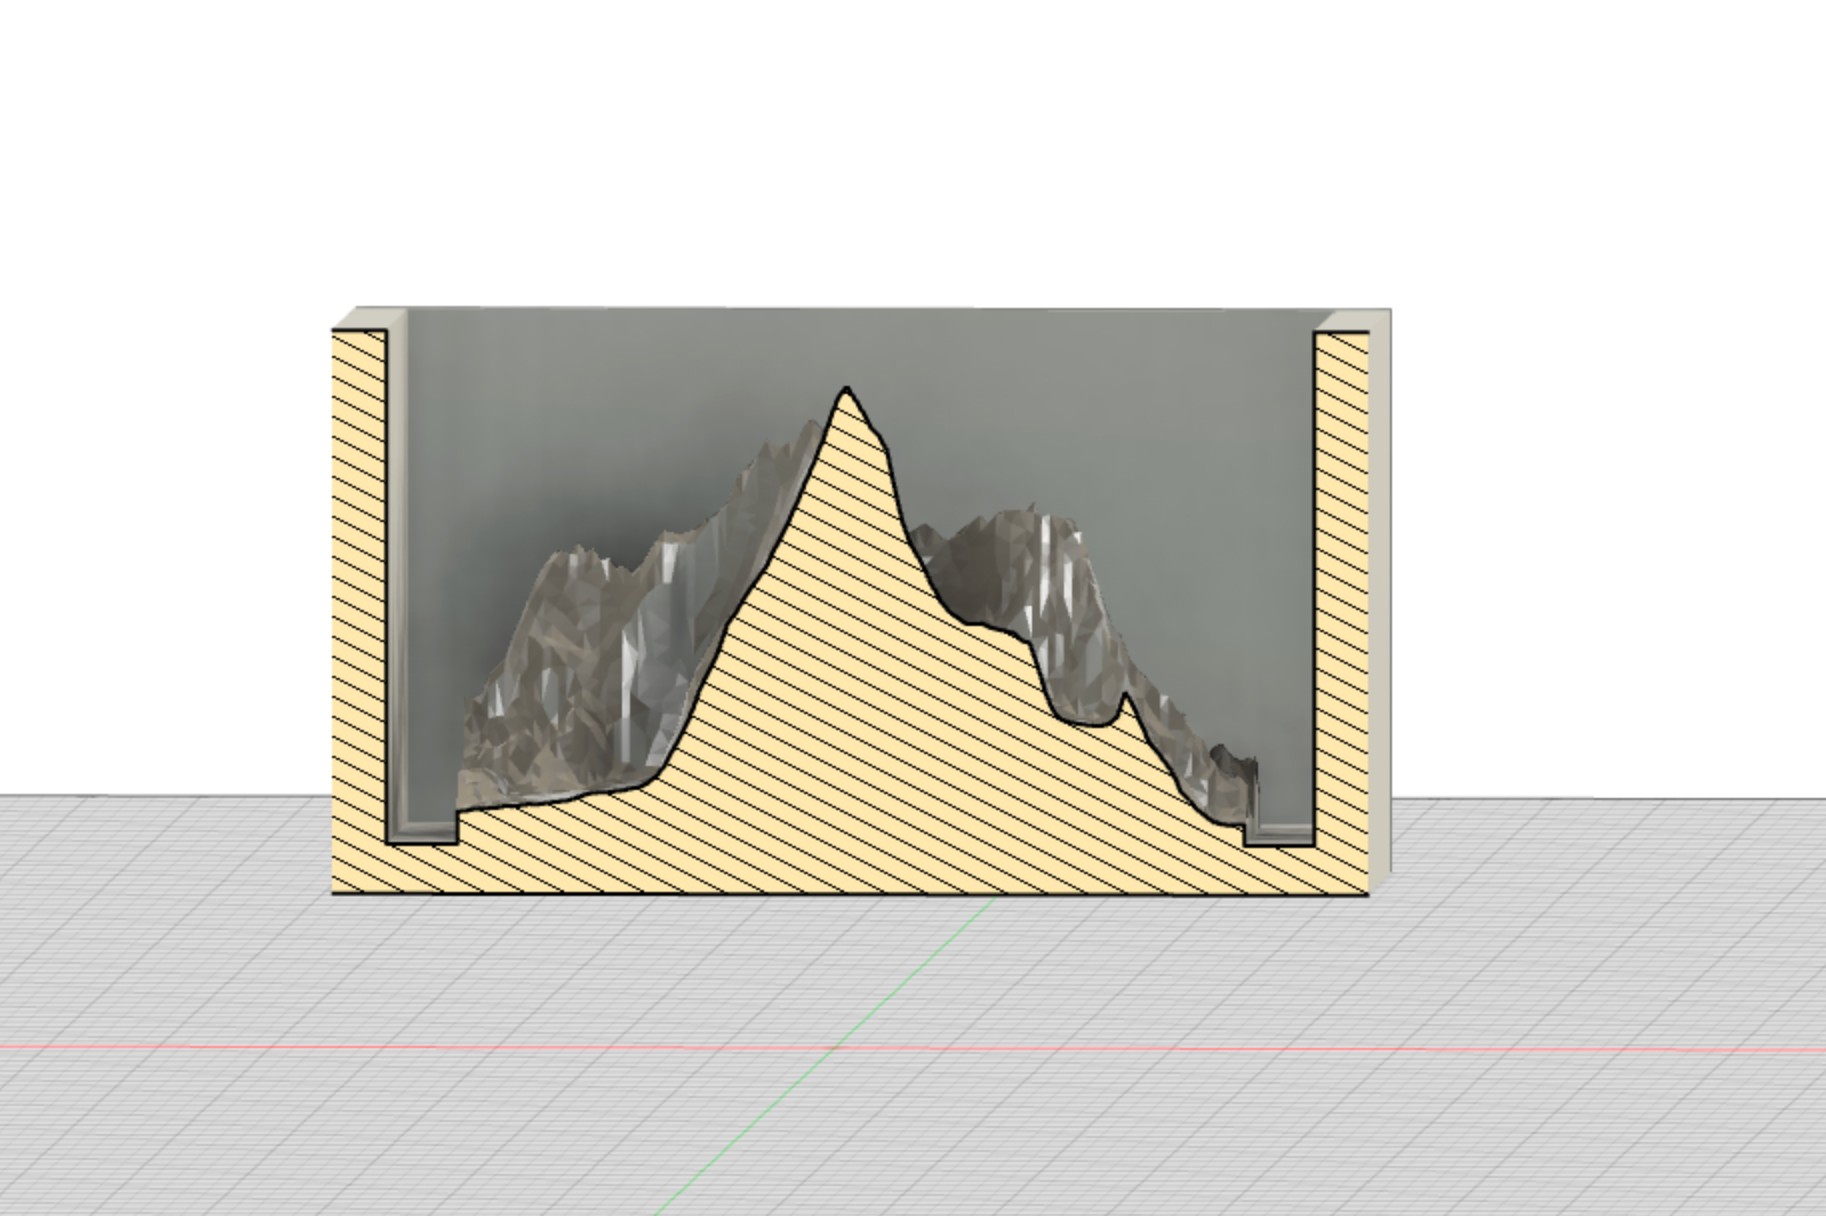
I decided to CNC mill the positive instead, which followed the same process using Terrain2STL and Fusion360. Except now, we add a base and walls to the 3D model instead. I also had to scale the model down by 60% along the Z axis to account for the drill-bit depth limit of around 25mm (~ 1in).
The cross-section of the final 3D wax model is shown below.
I used the SR-20 CNC machine to mill the wax model. Halfway through the mill, the drill-bit had wax stuck to it, which was not a good sign. I think that maybe the walls of the 3D model needs to be slightly slanted to account for for the angle between the tip of the drill-bit and the stem.
3D Printing
Because I wasn’t satisfied with the depth-limitation of the 3D wax milling, I could either ditch the walls to remove the 1-inch drill-bit limit, and attach acrylic walls to the wax mold to generate a silicon mold. Alternatively, I could 3D print the model instead, which I also did just in case the CNC milling didn’t work out. I ended up 3D printing a positive of Mount Fuji, and two positive molds of Mount Everest. One to be a metal jewelry mold and the other to be a medium-sized ice mold.
Casting the silicon
I used the OOMOO25 to cast directly into the wax and 3D printed mold. For Mount Fuji, I used a cup and stuck the 3D printed Mount Fuji model into the silicone and used tape to secure it in place. I also used SortaClear which is a food-safe silicon to cast one of the everest molds.
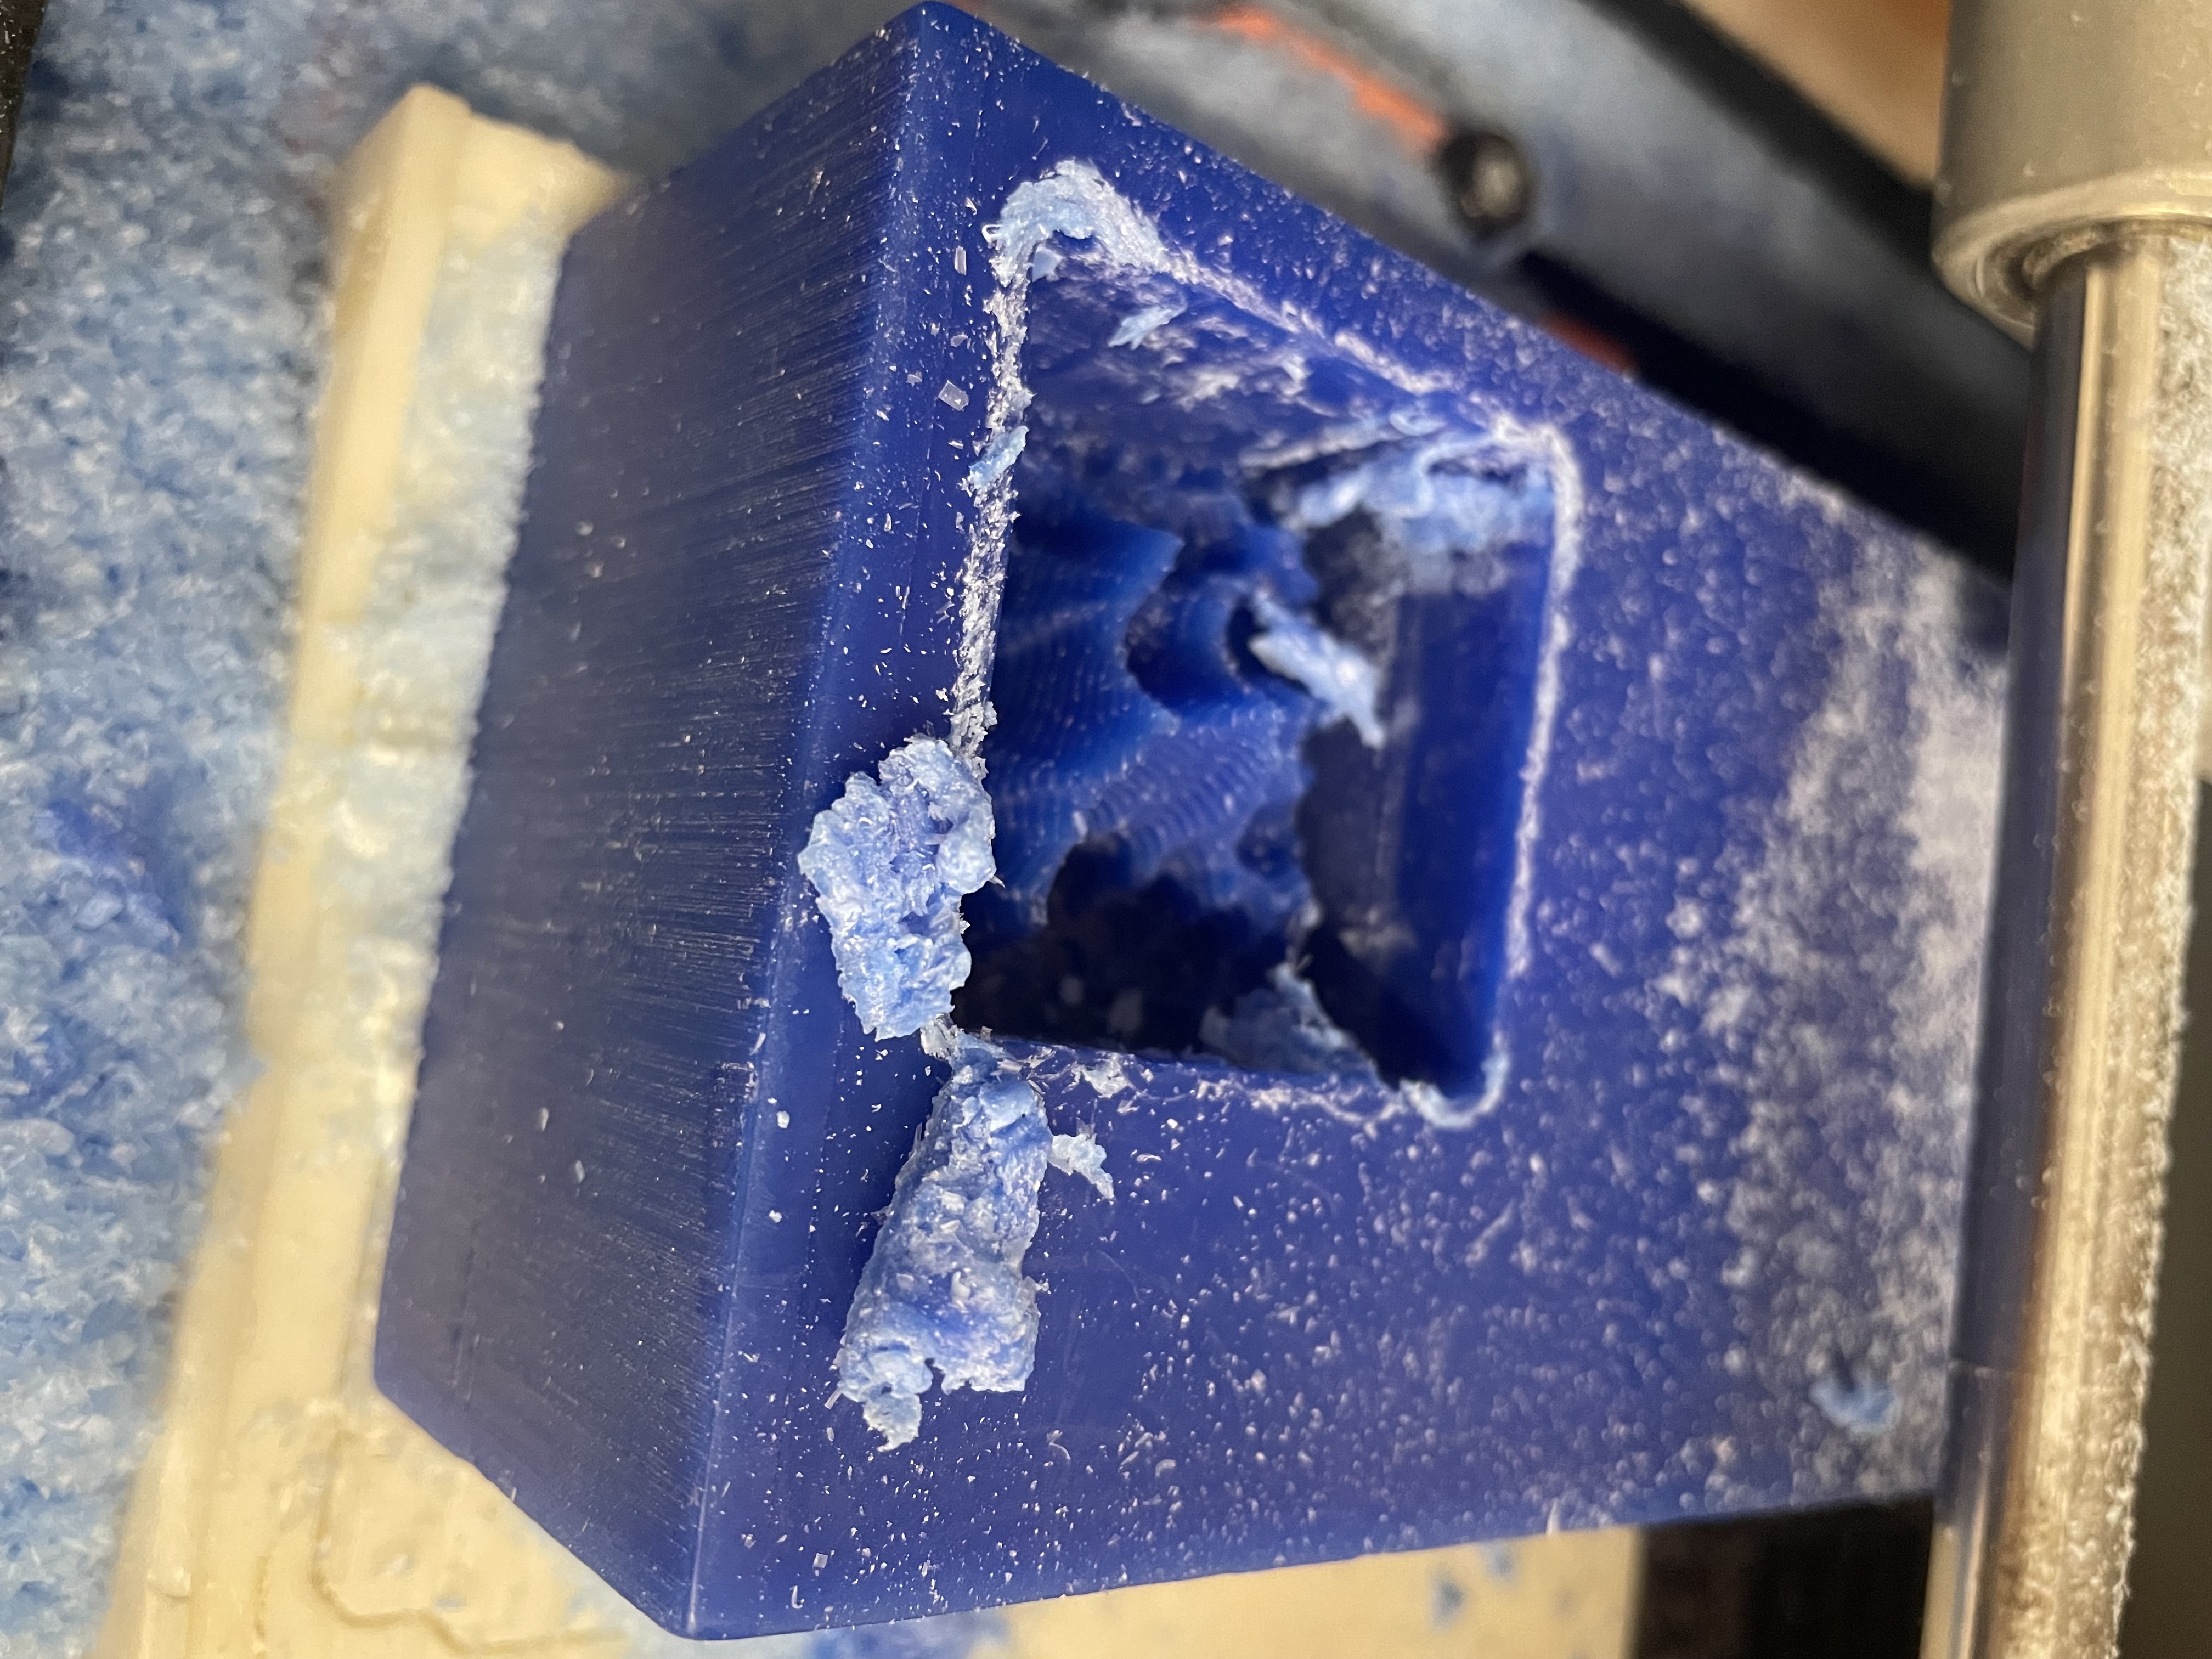
The roughing cut of the Everest wax mold turned out quite well, especially for something very deep. The only problem is that the stem of the drill bit is wider than the tip, so the stem started scraping along the walls, leaving large chunks of wax.
If I were to do this again, I would mill the enter wax figure without the walls, then
Results
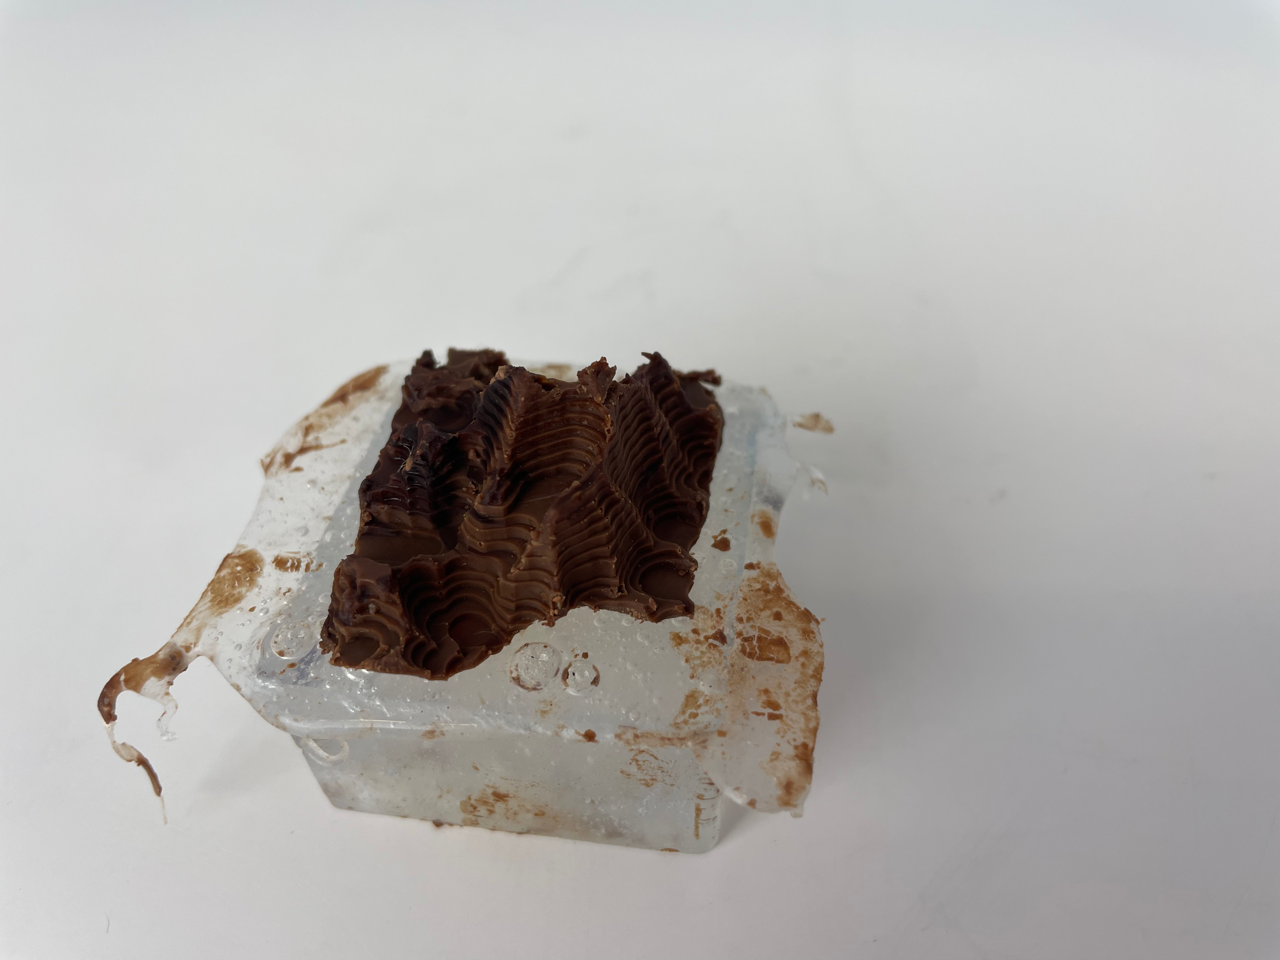
The results from the molds were pretty good, I didn’t manage to cast chocolate very well because of the intricate details since it is incredibly hard to temper chocolate without a precise thermometer. Correctly tempered chocolate is more brittle (snaps instead of bends when you bend it) and it shiny rather than matte.
The Mount Fuji mold worked out better because I stuck the 3D printed model straight into silicone, so it was easier both easier to remove from the silicone, and also filled in all the gaps. Pouring the silicon into a mold turned out much worse, since some of the smaller details weren’t completely filled in due to the viscosity of the silicon.
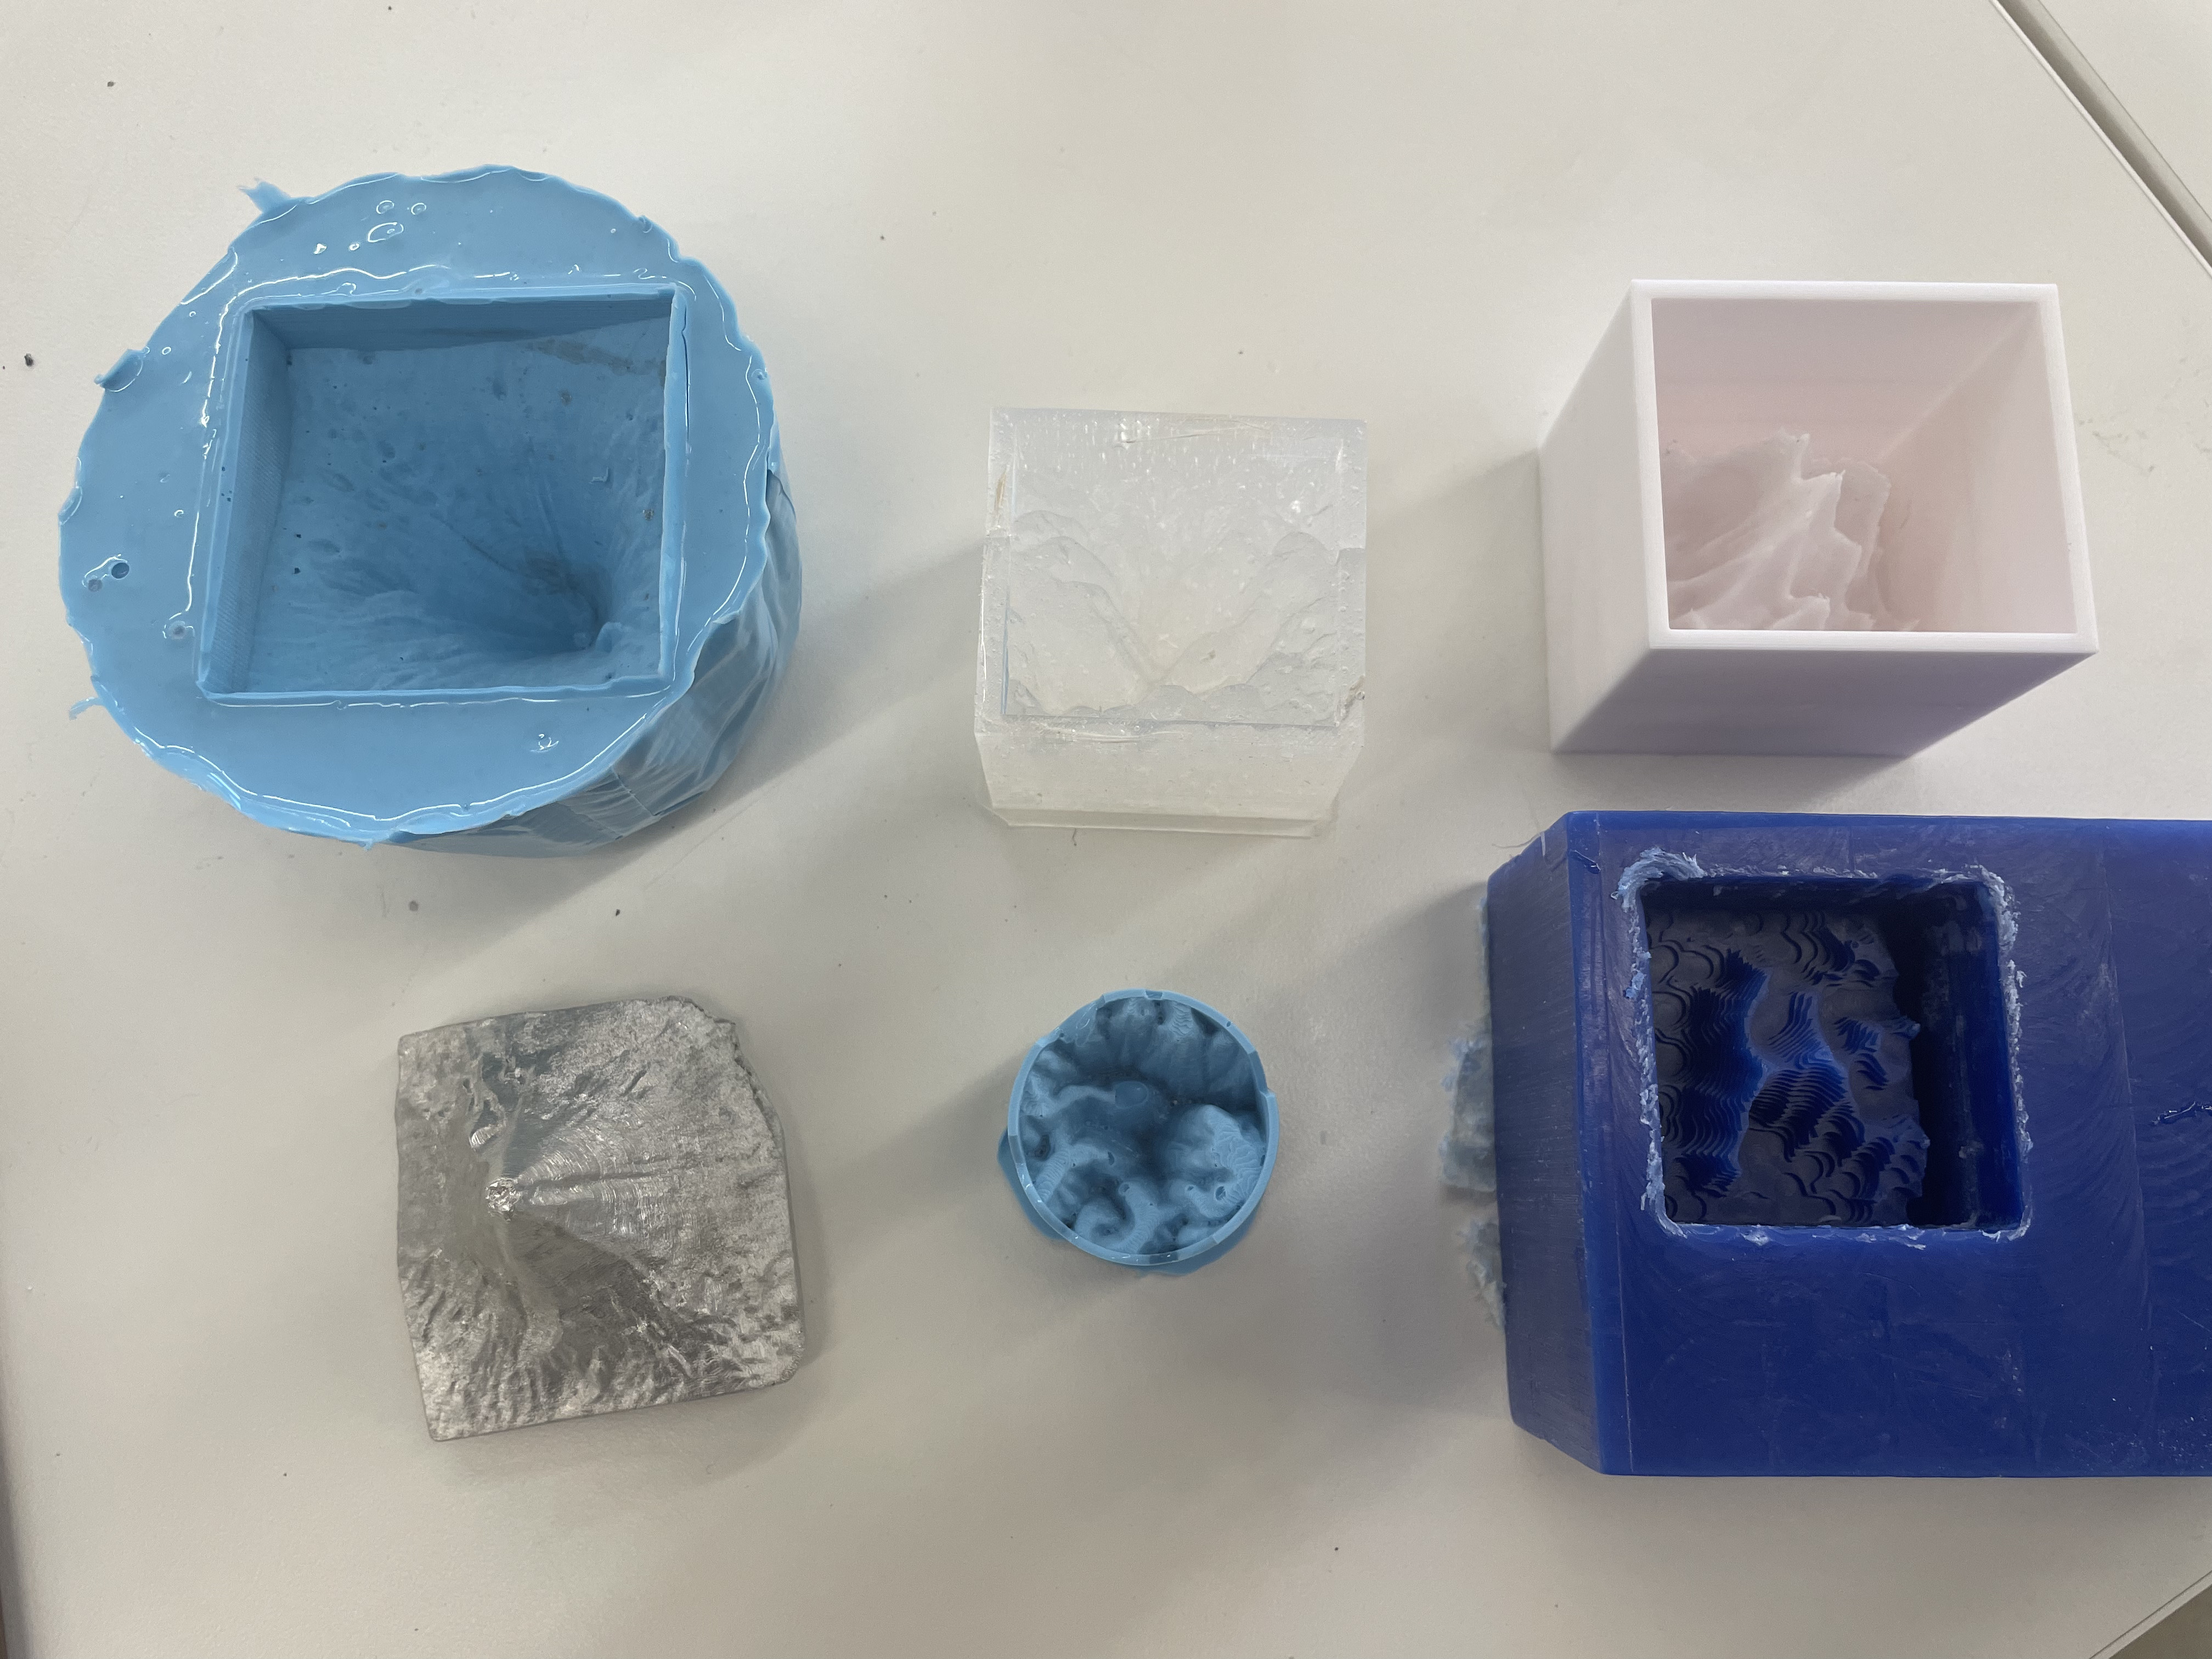
Here’s the small everest mold I made, which has large air-pockets and the silicon didn’t get into all the mold.
Here’s a picture of all the moulds that I made, as well as a metal cast of Mount Fuji.
I melted some chocolate using the oven in the lab, and poured it into my everest chocolate mold. Here’s how it turned out.
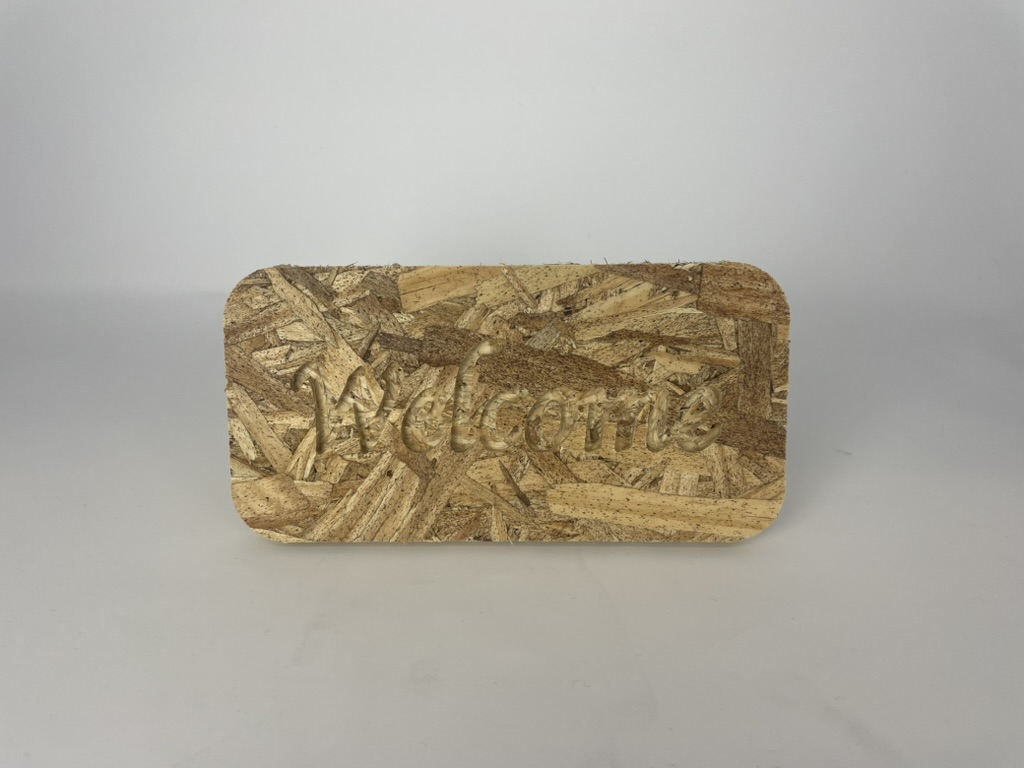
Wood Milling
For wood milling, I wanted to create a simple ‘Welcome’ sign for my front door. I designed this in Illustrator but making a rounded rectangle, and font-outline. The final CNC is shown below. Some of the smaller details such as the ’e’ broke off due to the wood quality.