3D Design & Printing
Table of contents
This weeks task is to design and print a 3D object that cannot be easily created using subtractive methods. I decided to design a Klein Bottle and a Torus. For reference, a Klein bottle can be loosely thought of as a ‘3D mobius strip’ and a Torus is essentially a donut. They’re both interesting mathematical objects and also very hard to create using subtractive methods. I used Fusion360 to design the Klein Bottle and MeshLab to design the torus.
Klein Bottle
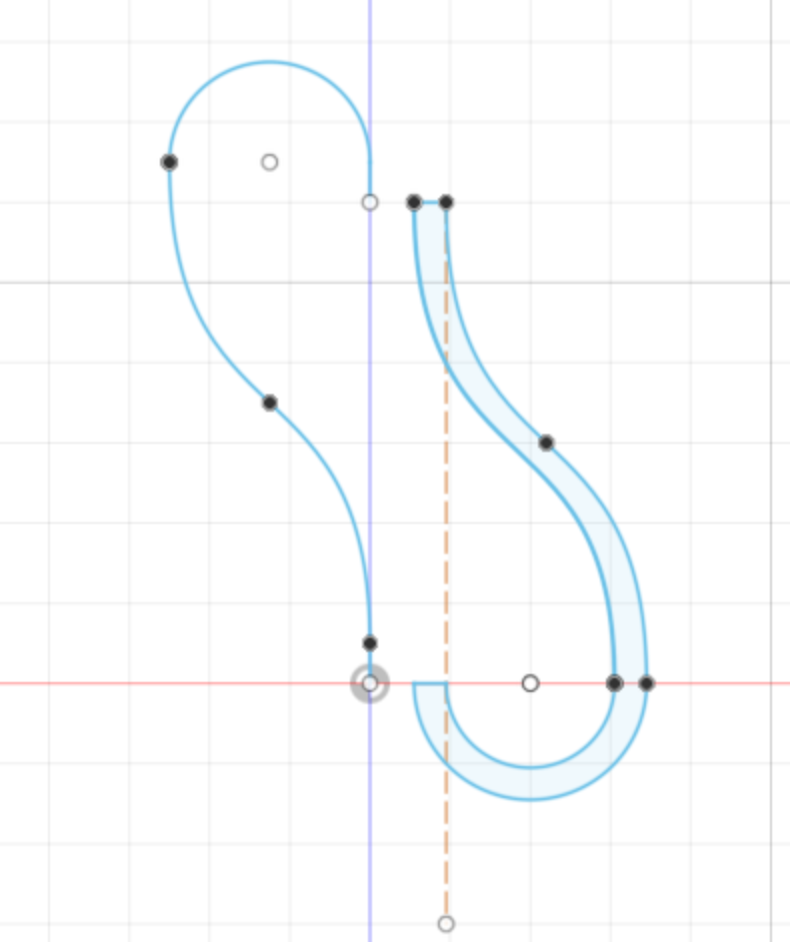
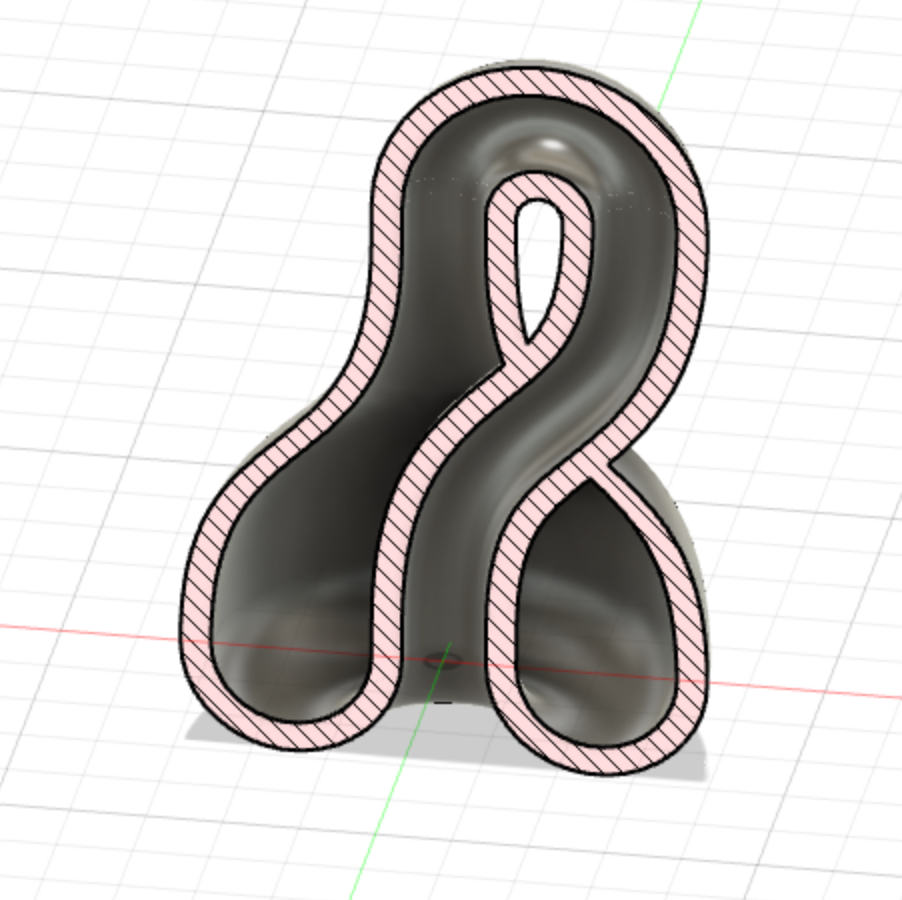
To design the Klein bottle, I first created the body, which is made by combining a cubic spline, using a fit-point spline and adjusting the tangents. This was then revolved around the y-axis to create the body. The handle or neck was then created by creating a path and using the ‘sweep’ tool to extrude a face along a path which connects the opening at the the opening at the bottom. The intersection between the body and the neck was cut out using the ‘offset face’ tool with a negative length. The final cross-section of the Klein bottle is shown below.
T
Klein Bottle
The printed klein bottle.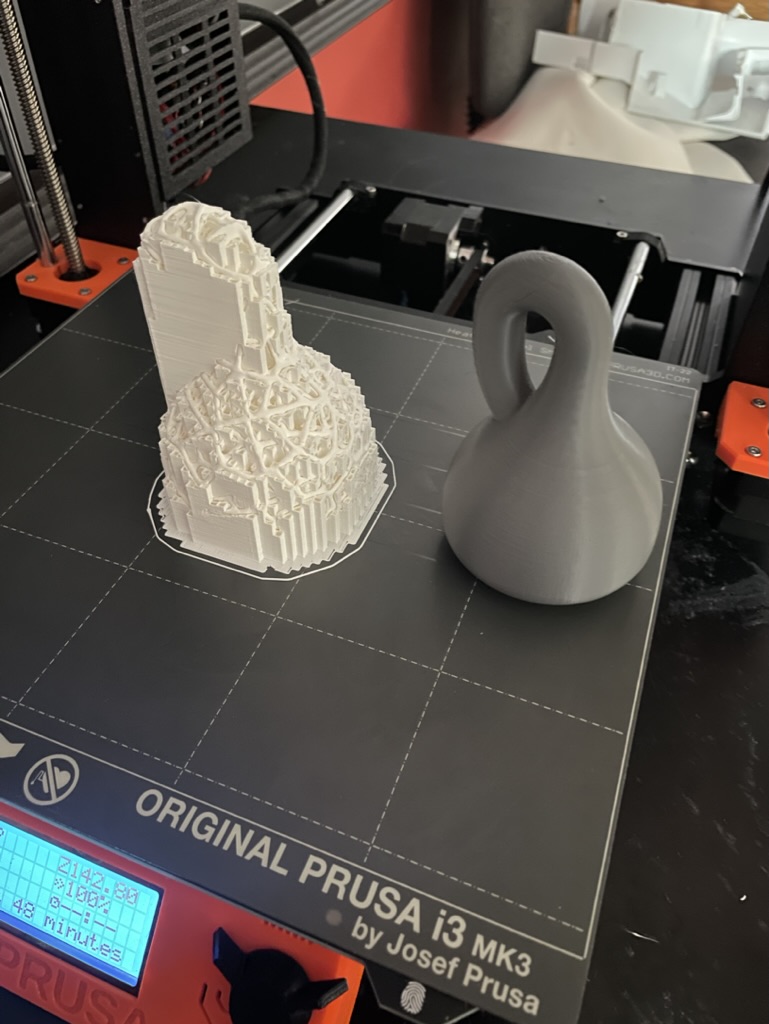
Klein Bottle
3D Voronoi
It didn’t feel satisfactory to just print a 3D Klein bottle because you couldn’t see the inside of it, which was the main point of a Klein bottle. So I decided to find an interesting way to print a structure that you can see through. A Voronoi tesselation on the surface seemed like an interesting way of doing this. However, Fusion360 isn’t very good at applying a Voronoi pattern to the face of a non-flat object. I tried using the projection tool and the emboss tool to place a 3D voronoi pattern on the Klein bottle, but Fusion360 only allows embossing on singly curved surface (e.g. side of a cylinder, or side of a cone). projection was unsatisfying because it was a linear projection, so the holes on the side of the bottle will be alot larger. It turns out, to get a 3D Voronoi structure, it is most natural to apply a Voronoi tesselation a point-mesh cloud. Unfortunately, Fusion360 does not have great tools for handling meshes, an add-on MeshMixer is popular but only works on Windows and support by AutoDesk ended in 2021.
So I decided to use a software package called MeshLab to create a Voronoi pattern on the surface of the Klein bottle. I used the ‘Voronoi’ filter to create a Voronoi pattern on the surface of the Klein bottle. I then used the ‘Smooth’ filter to smooth out the edges of the Voronoi pattern. The final result is shown below. (For those who plan to use MeshLab, make sure to download a recently built version since they fix many bugs in the release version.)
Torus
To create the torus, I used Meshlab which already had a built in torus tool, making sure to choose a high-quality mesh (i.e. smooth). I used the Possion Disk Sample filter which is a method that is used to select roughly equally spaced points on a surface. Using the Voronoi vertices colouring tool, I was able to calculate the geodesic distance between the poisson disk samples and the torus mesh. Choosing the points in the mesh that are far away from the Poisson Disk Sampled points creates a Voronoi pattern on the torus. Then by re-meshing, I was able to create a Voronoi pattern on the torus. The final result is shown below.
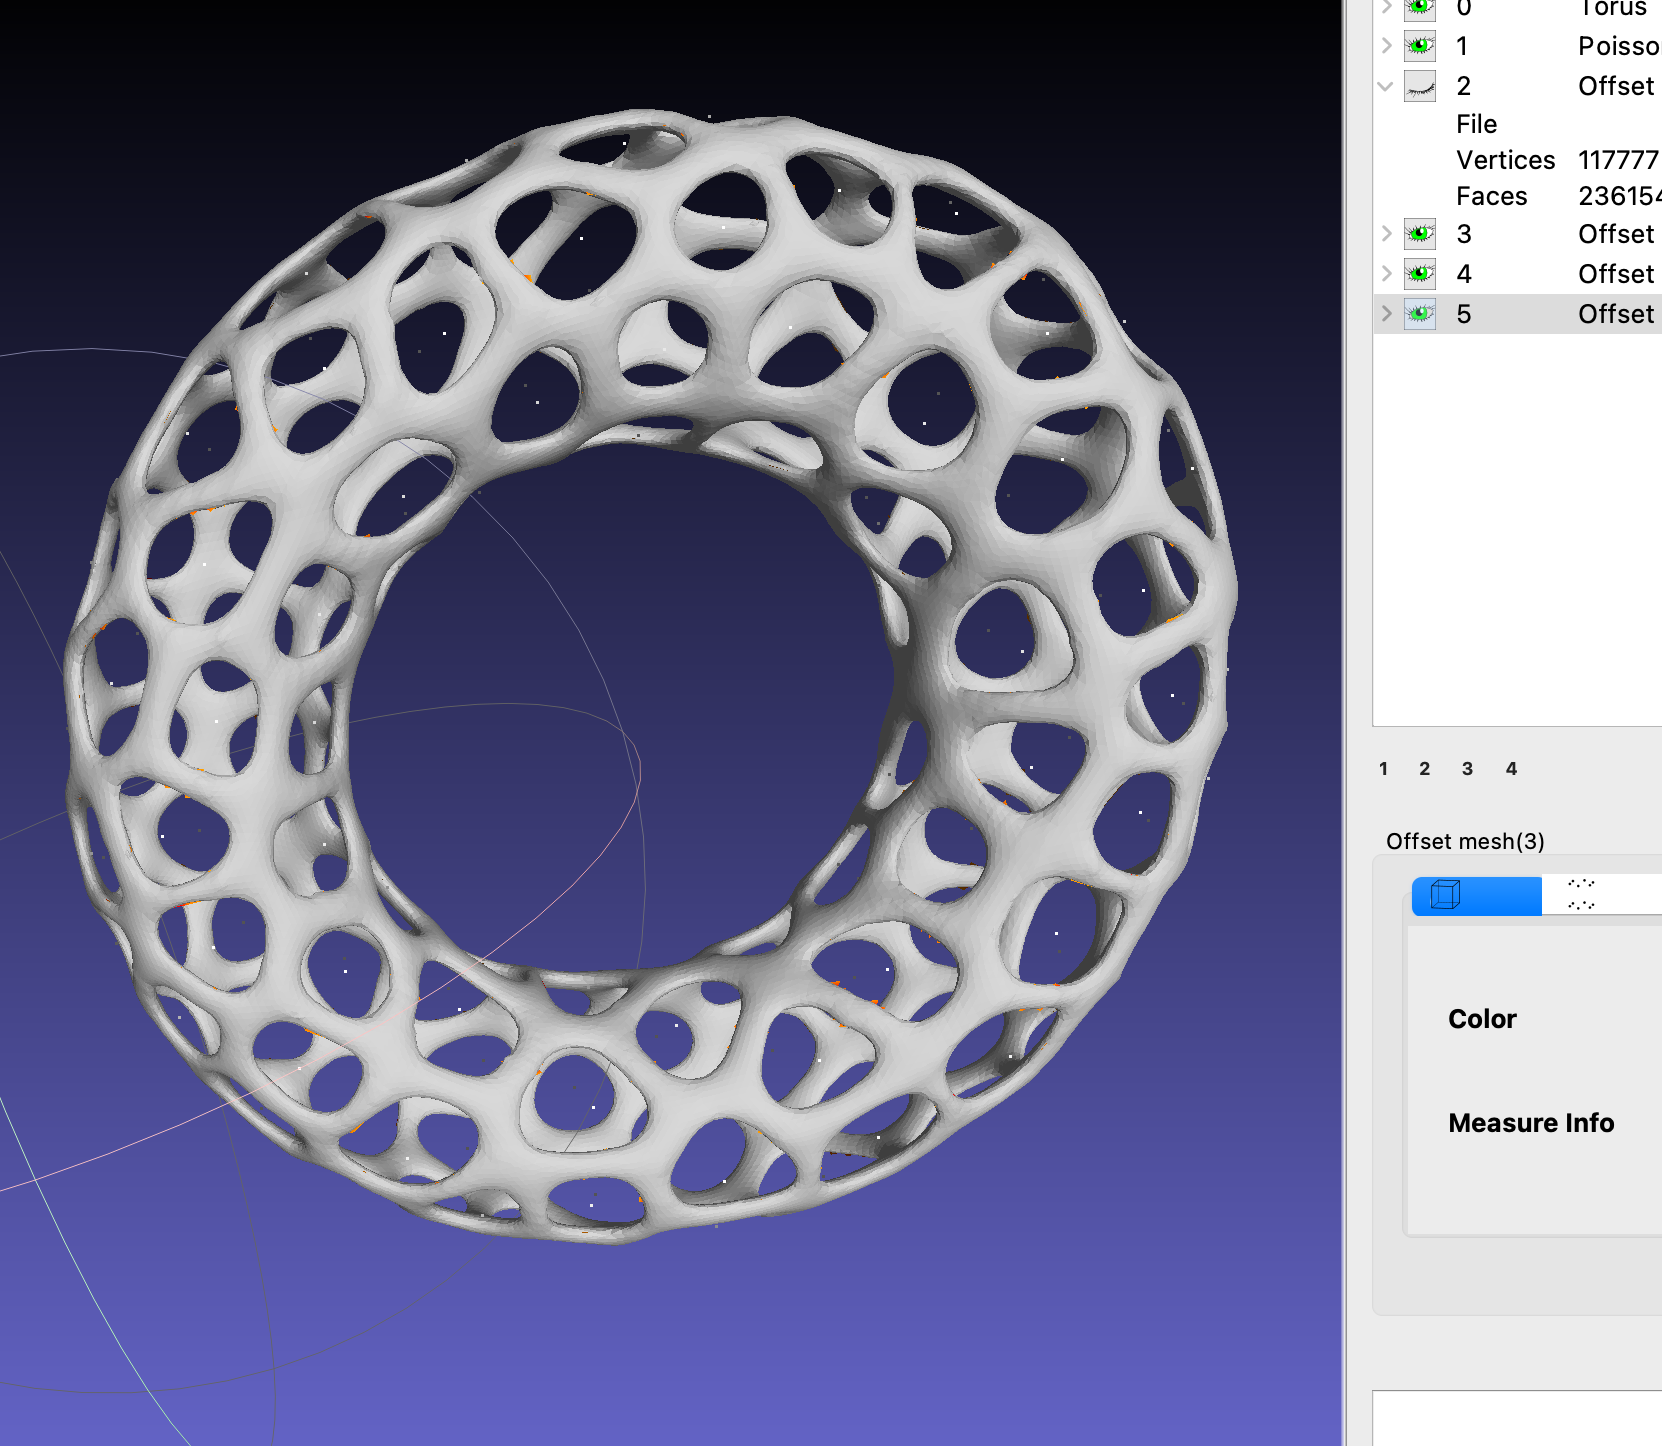
Voroi Torus
For the Klein bottle, the method didn’t achieve that great of results because the geosedic distance was not calculating properly, perhaps becuase of the poisson disk sampling. Instead I used an online voronoi generator to create a voronoi pattern on the Klein bottle. The final 3D model is shown below.
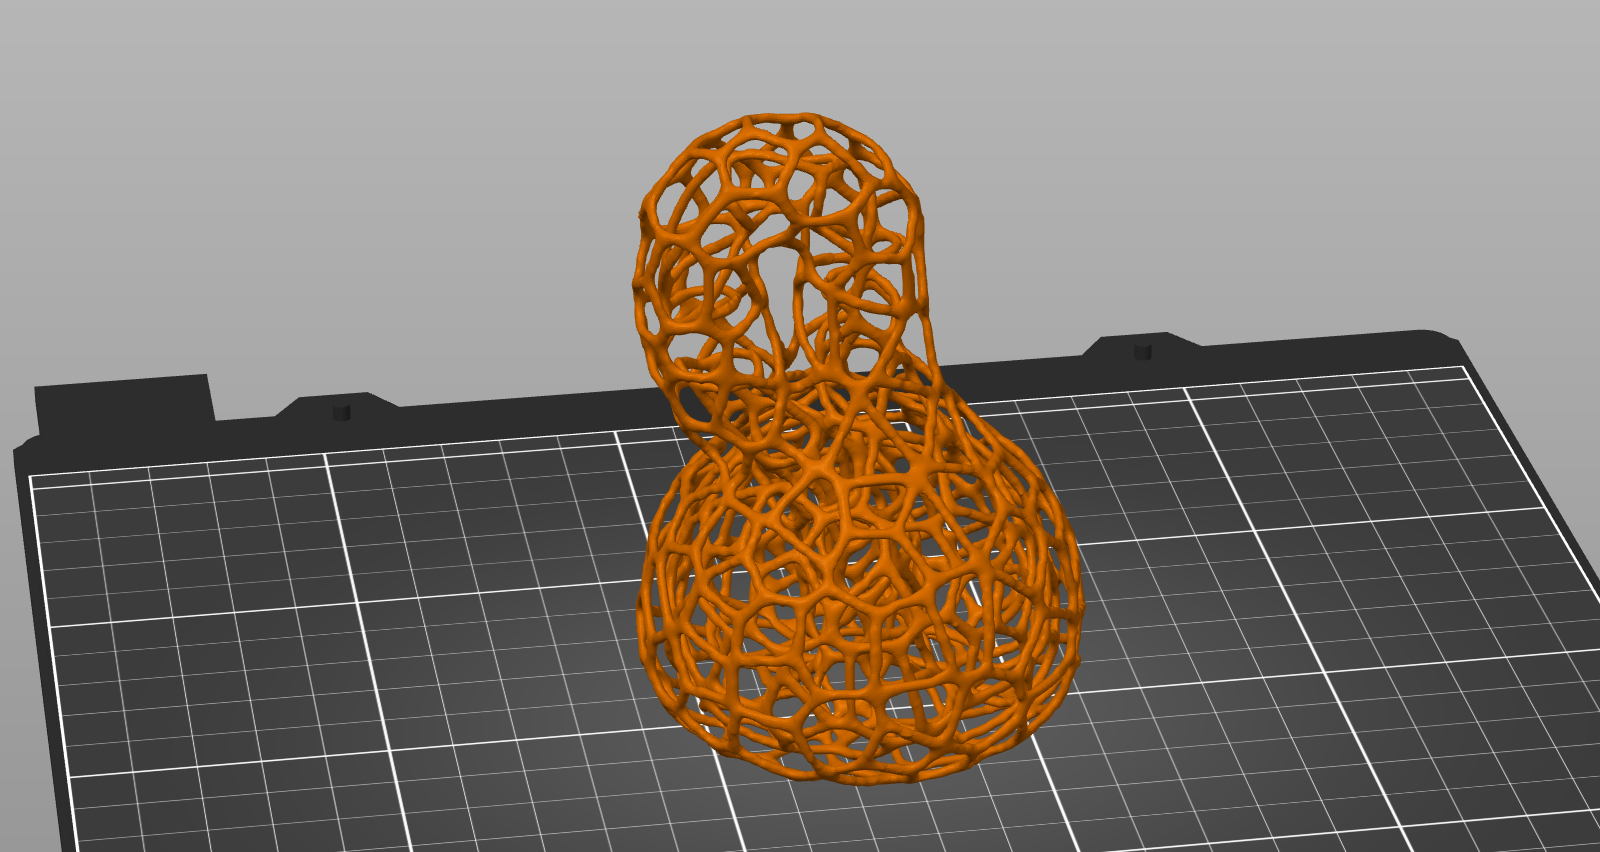
Klein Bottle Voronoi
Printing the final model wasn’t that straight forward. The print wasn’t sticking so I tried using supports, but that filled the inside of the structure with hard-to-remove supports (see above). After a few more tries, Adding a large brim and not using any supports worked, but there were some overhangs where the 3D print wasn’t very high quality.
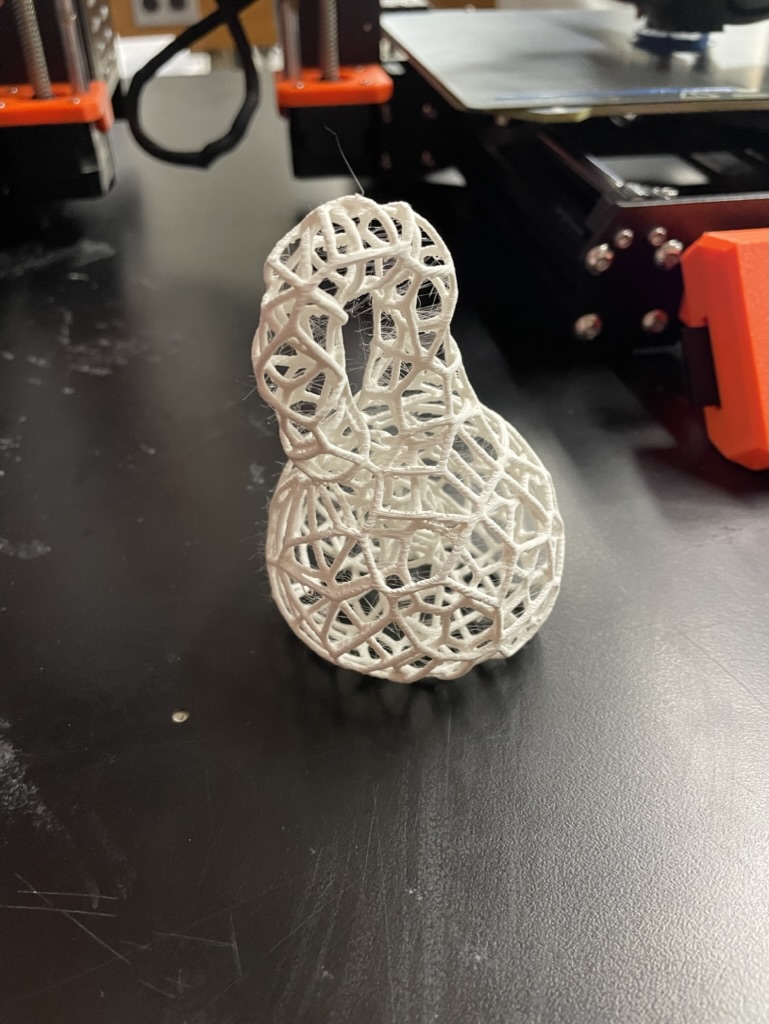
Klein Bottle Voronoi
And the torus, which I printed using custom support settings (in PrusaSlicer print settings) for easy to remove supports and also using a 10% overhang setting.
0.25mm z distance.
75% xy distance.
3mm support spacing.
4 interface layers.
0.2mm interface layer spacing
