Week 3: Hand tools and fabrication
Table of contents
Kinetic sculptures
While researching different types of kinetic sculptures, I was really intrigued by wire sculptures. The thin lines are really elegant and I like how objects connected to the wires move.

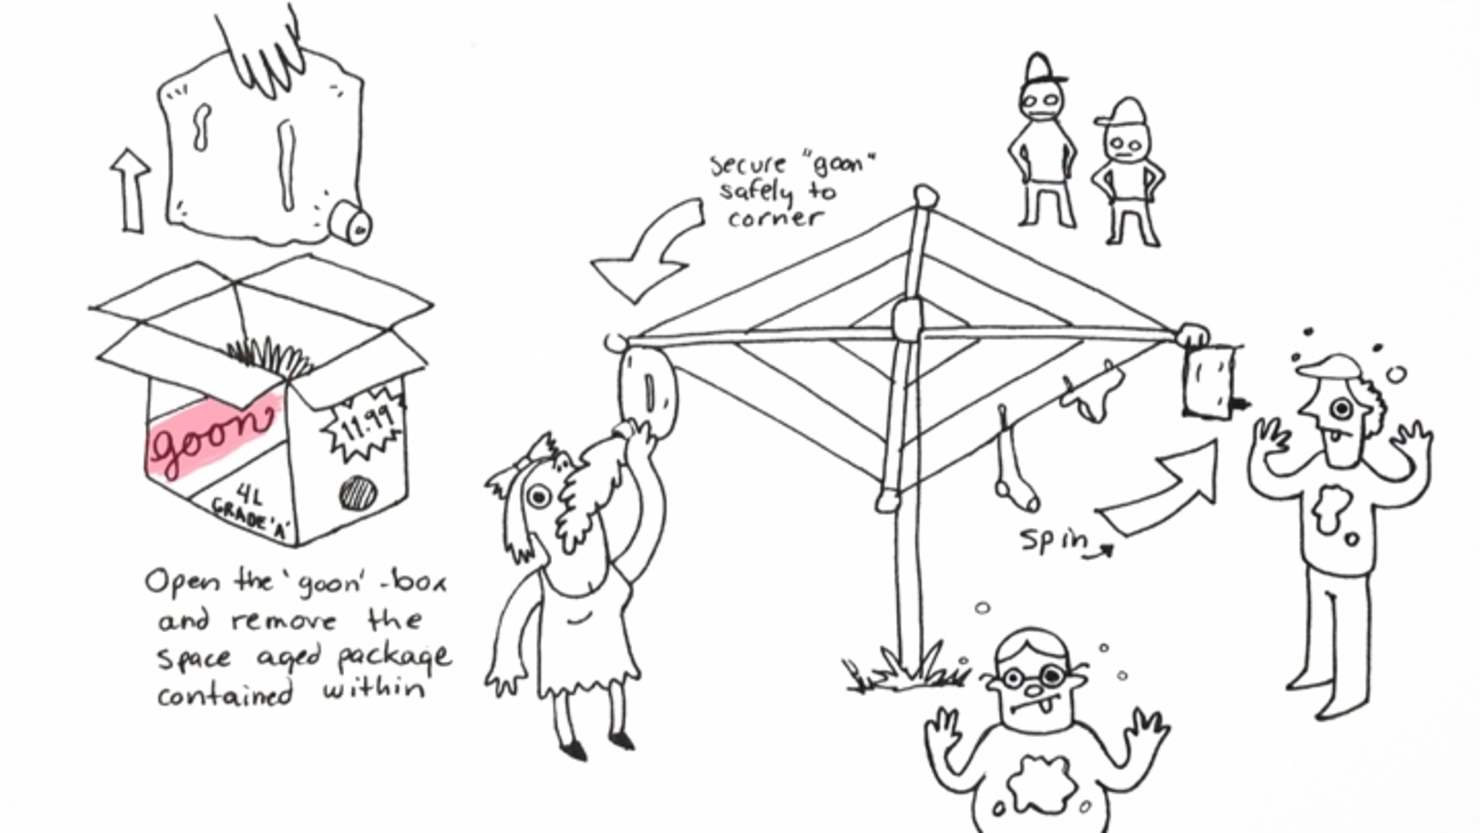
These types of sculptures reminded my of a Hills Hoist , typically found in Australia and is used to hang dry clothes (dryers are alot less common there), it spins around when it’s windy and also a fundamental instrument in Australian university culture. I thought it would be cool to make a wire sculpture that resembles a Hills Hoist and spins around using a motor, along with some figurines that move up and down around the hills hoist.

My plan is to use wire to build it because it’s the same material and color as the classic hills hoist.
My initial plan was to make everything using one piece of wire and elegant bends but wire is really hard to work with by hand. Everytime I tried to wrap the wire around or bend a new part of the wire, another part of the wire which I already completed would go out of shape. I ran into alot of issues this week while working with wire… Since I couldn’t do everything in one piece, I thought that I would ‘just be able to’ solder wires together to attach the separate pieces of wire together but when I tried to solder wire together the solder wouldn’t stick, and instead if would ball up. After troubleshooting my problems using Google, soldering aluminium wire is difficult because you need to clean the oxidized layer of aluminium off the wire before soldering. Instead of soldering, I had to tie the loose wires down using knots. I also tried making wire gears, but without the special wire-gear bending tool (See this and a welding torch (since we learned how to solder wires together I naively thought that solder was able to take the place of a weld, and that bending wire by .)
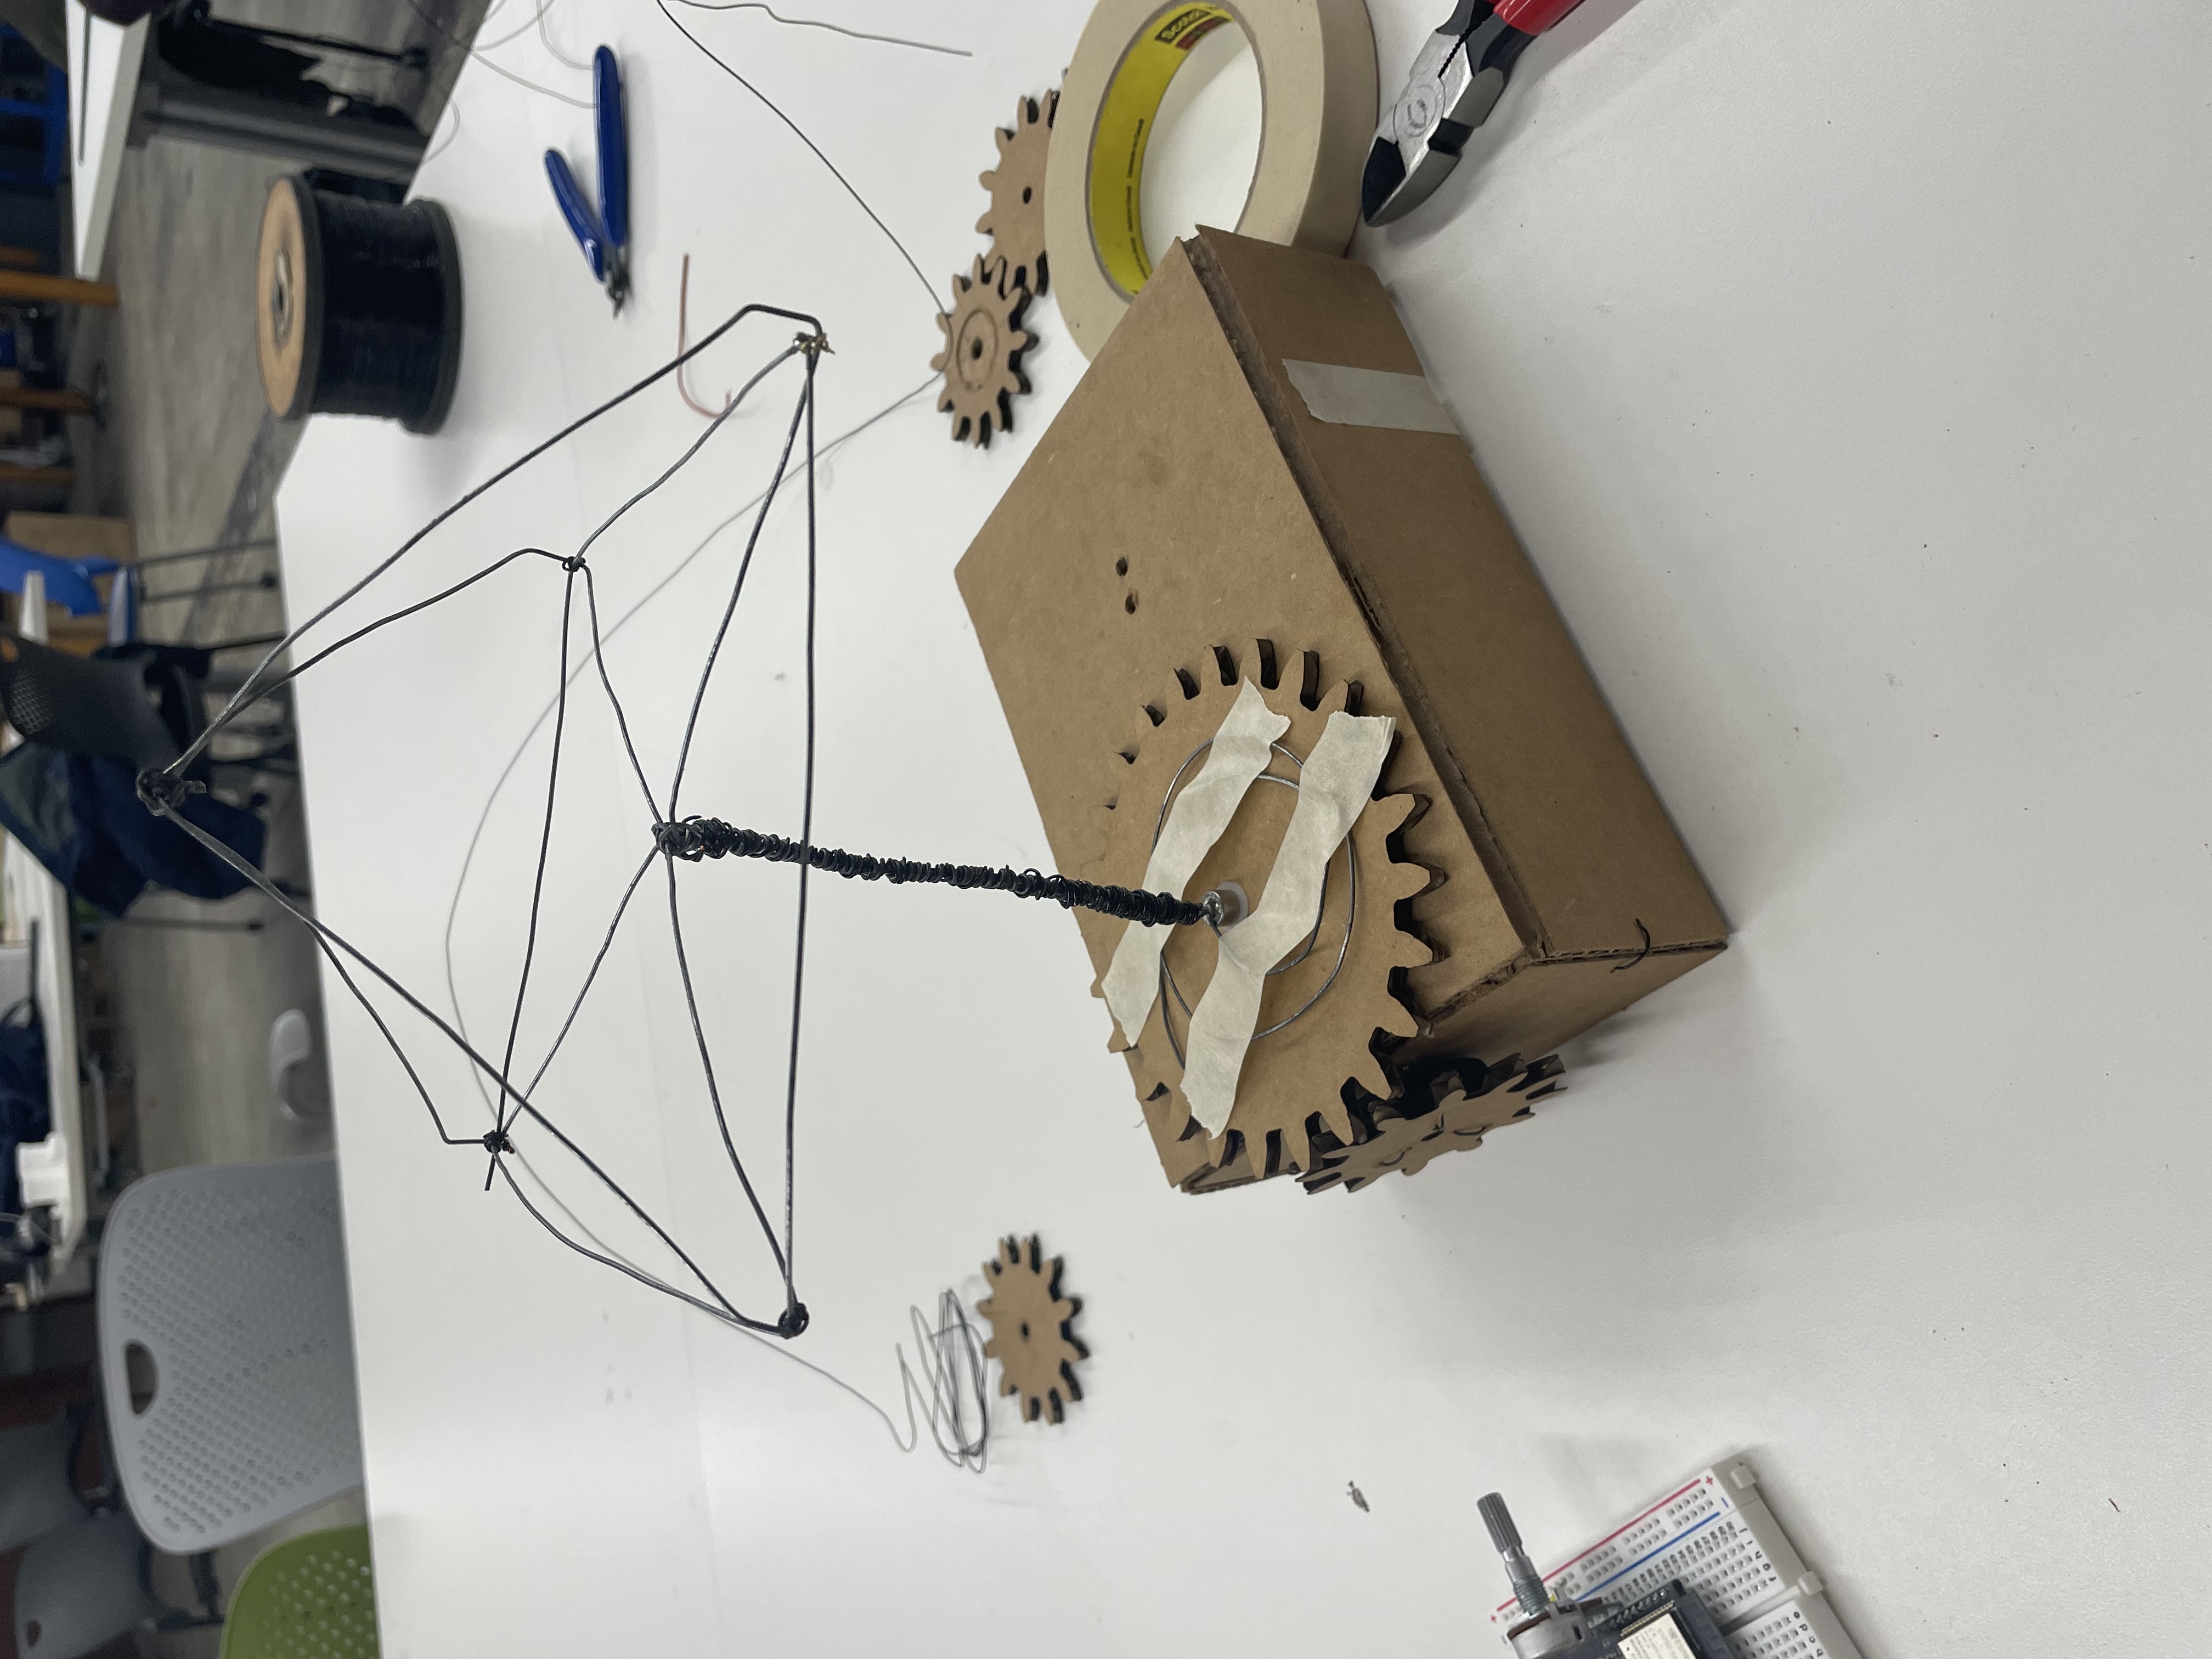
I had to change my plan a little and use laser-cut gears instead of wire gears, attaching the sculpture to a box instead of it being attached to a wire cog. I found it quite difficult to attach the motor to the gears, I ended up using wire to attach the motor to the gears, but then realized it might be better to laser cut a hole that is the exact size of the motor wheel. To attach the gears to the box, used a m5x15 screw and nut with an m5 plastic washer on the top and bottom of the gear to reduce friction. This worked pretty well.
I also had to change the design of the hills hoist to make it more stable by adding a wire base. I still haven’t figured out the most elegant way to attach the base to the gear but for now I’m using tape, which is not ideal. I plan to improve this prototype by reprinting the gears in acrylic and either tying down the sculpture to the gear or attaching using hotglue.
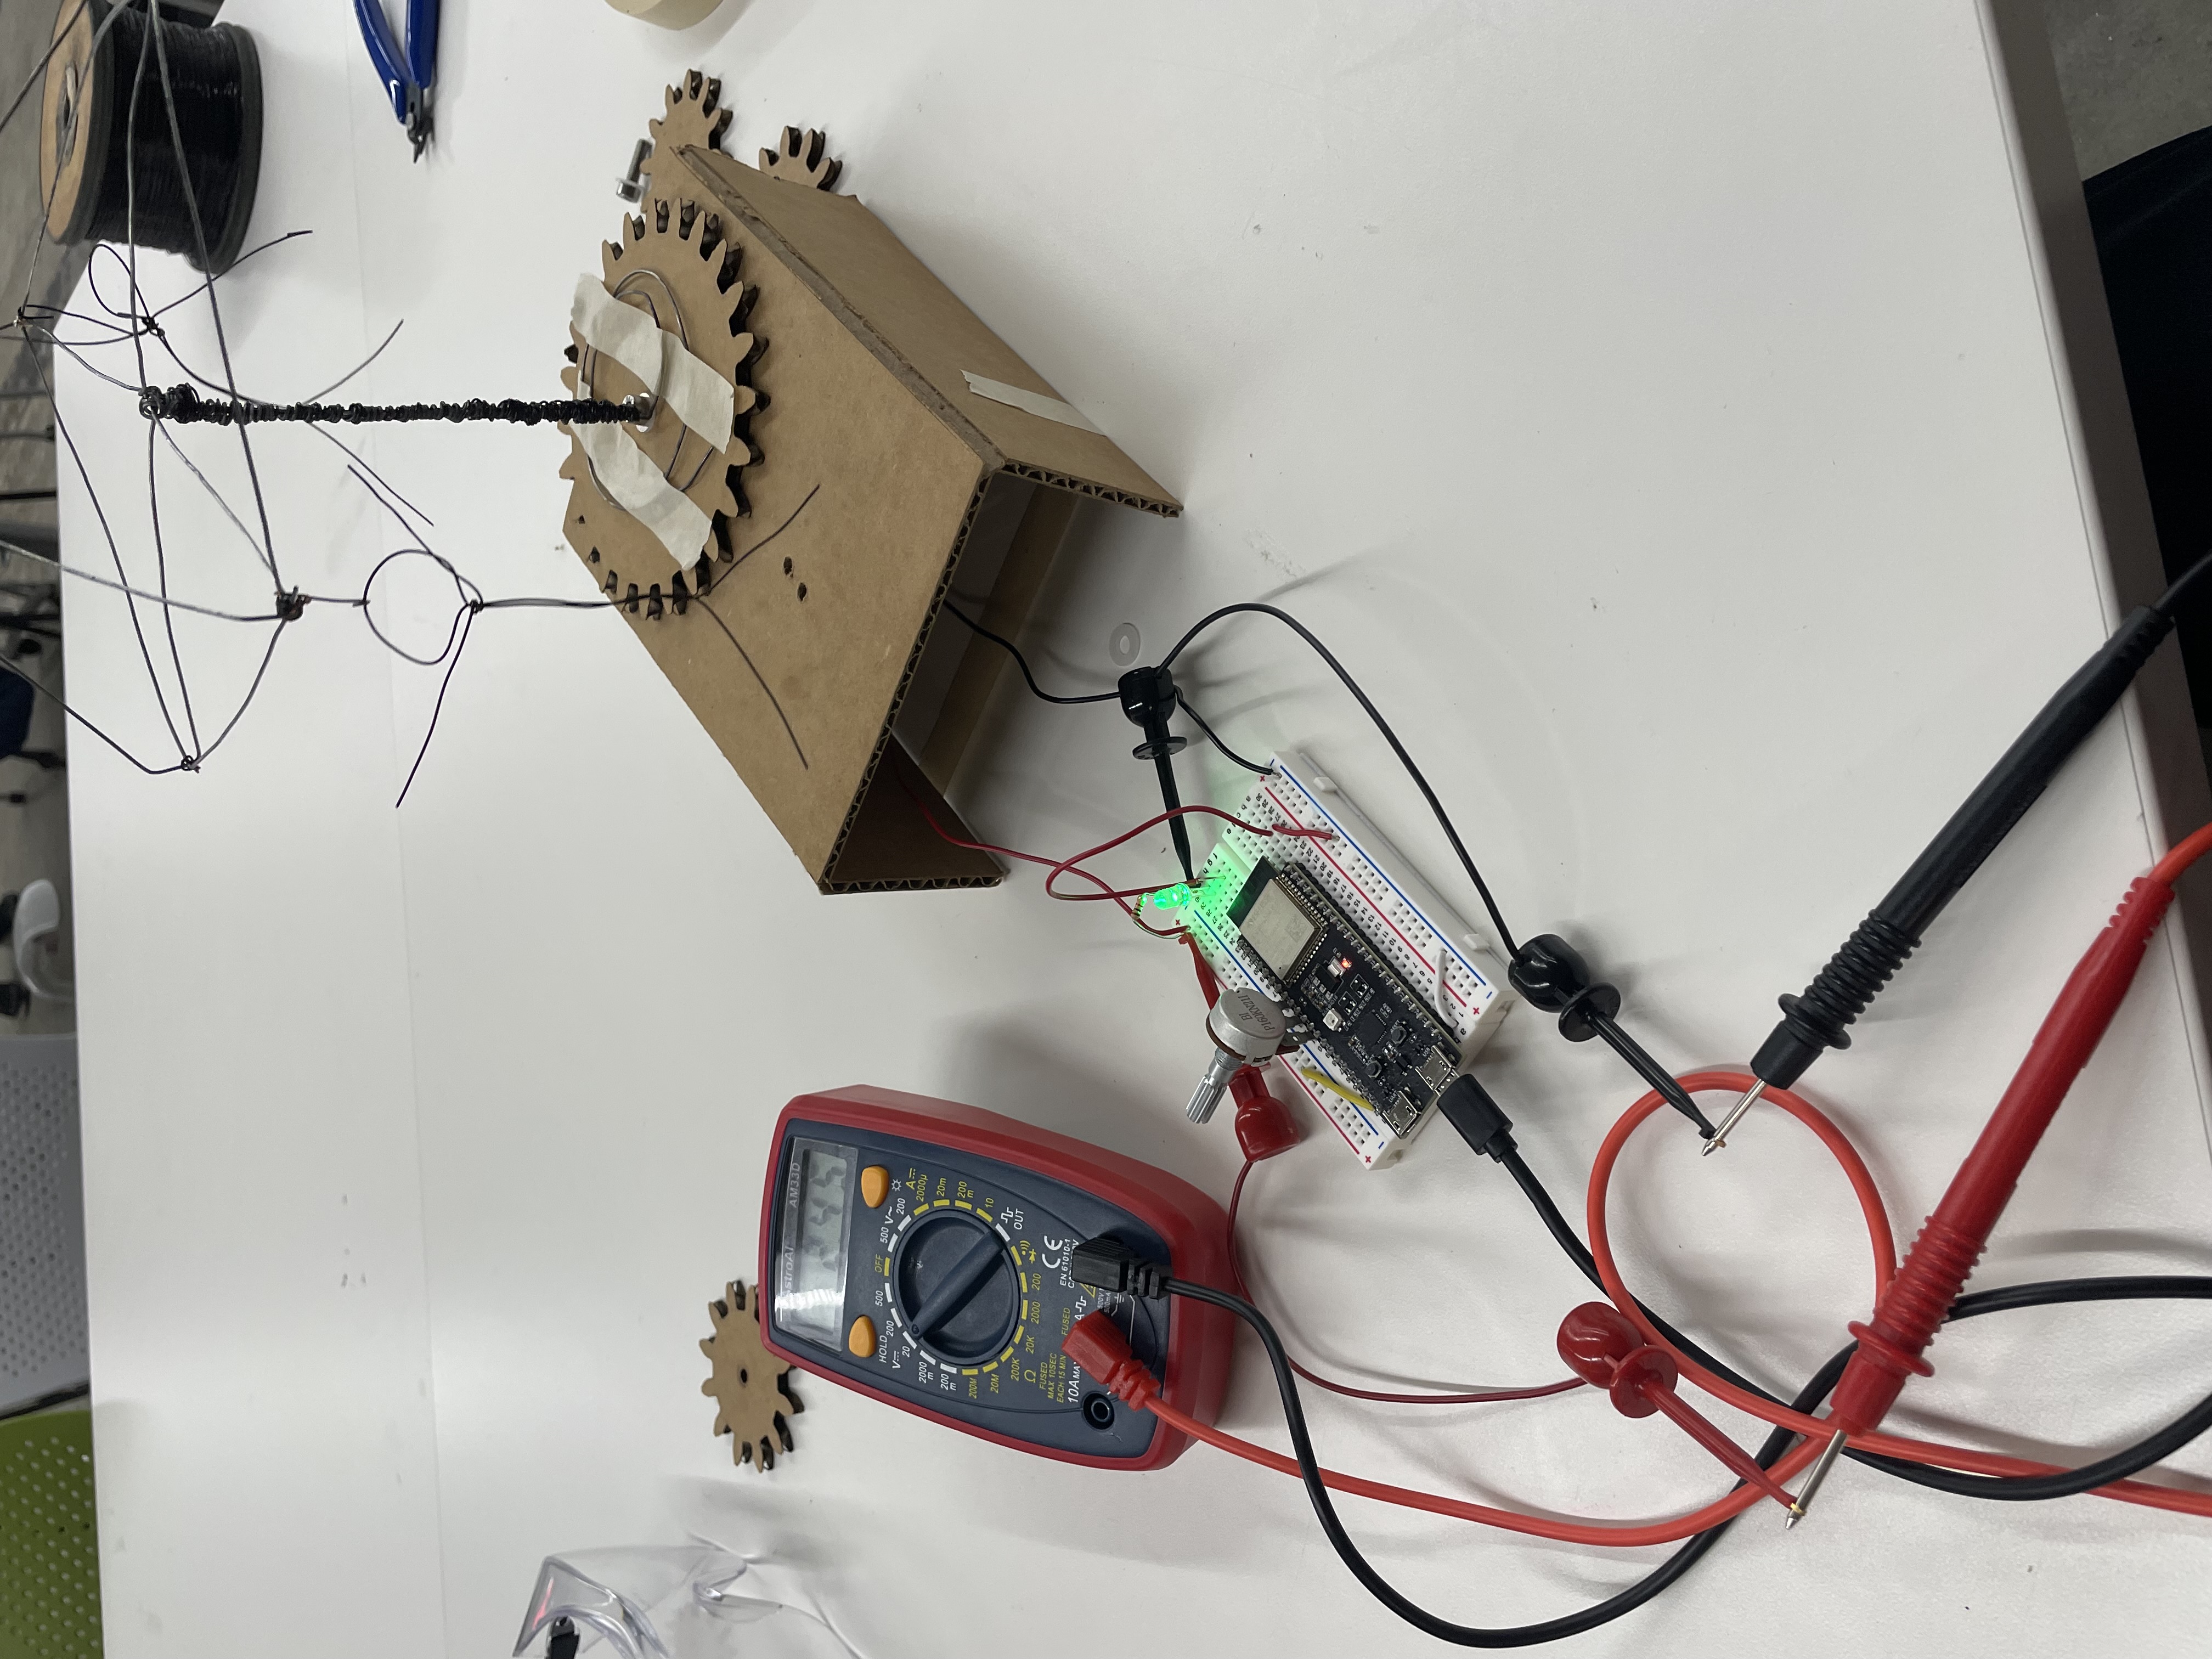
To measure the circuit I measured the voltage across the motor with the load (4.92V), and also attached the multimeter in continuity mode to measure the resistance of the motor and using Ohm’s law calculate the current to be 2.5$\mu A$. This means the wattage is ~0.1W which is really small.