Week 2: 2D Design & Cutting
I was on the waitlist for the class and joined 1.5 weeks late so my documentation starts on Week 2 :). This week, I worked on:
- developing the website to document my progress throughout the course
- Working on 2D design and laser printing using Fusion360
Website creation
I have pretty much no experience in front-end web development, most of my skills are in backend development and database stuff. I chose to develop this website using Hugo. Hugo is an open source static site generator written in Go and supports TOML, YAML and JSON data file types and Markdown/HTML content files. Apparently it is also the fastest static site generator out there.
I chose this method because using a static website generator seemed like a middle ground between from-scratch web development and using the template provided by the course instructor.
To get started, I followed the Hugo getting started guide to add some content. Hugo builds pages off markdown files which are relatively simple to understand. There are a few components that I had to read into, mostly:
- Hugo’s config file
config.toml - Folder structure
- Themes
- Pushing it onto Github Pages
Hugo’s config file is quite readable, think of this as an options page. Hugo’s folder structure is also quite intuitive, the content folder contains all the markdown files and the static folder contains all the static files (images, css, js, etc). The themes folder contains the theme that the website is using. For themes, I started of with the Blist theme
, but I found it to be a bit too complex for my liking so I went down a rabbit hole of trying to figure out how to turn off some of the elements. It turns out I just had to edit 5-6 html files to get to the current layout. Figuring out how to get GitHub Actions to build my site was a pain since the default script provided by Hugo didn’t work.
2D Design: my first laser print
Fusion360
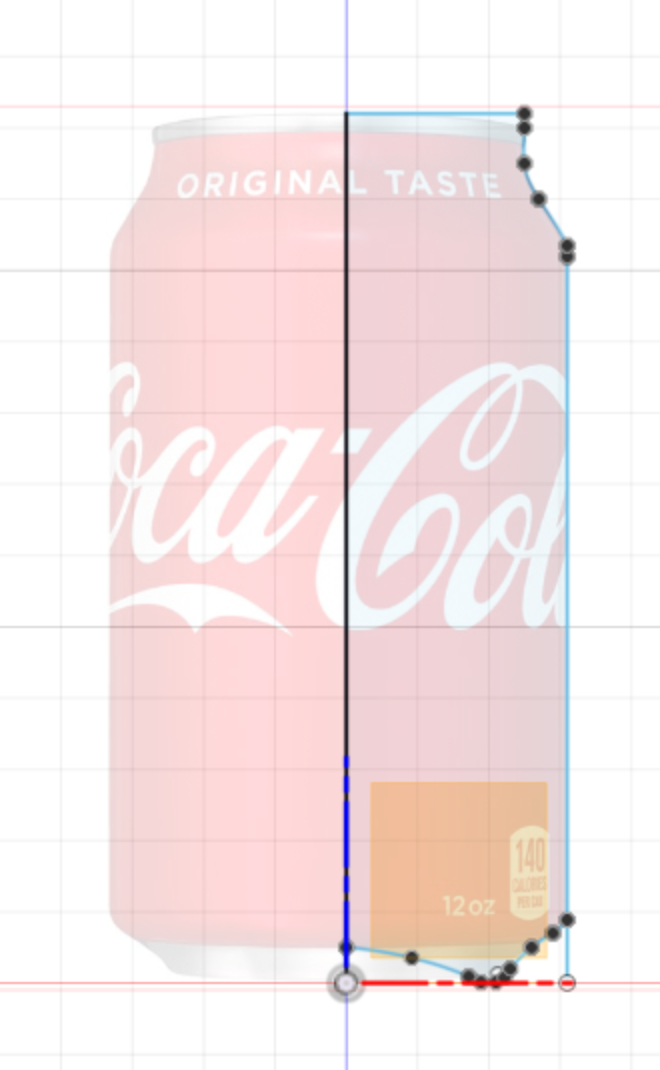
To learn Fusion360, I followed a few different Youtube tutorials. I decided to choose a 12oz aluminium can and my iPhone as objects to model in Fusion360, my thought to learn how to model a round object and a flat object with small details.
For the can, I thought it would be easiest to model the cross-section and then use the rotate tool to get a 3d model. To model the cross section, I just measured the height and diameter of the can. I then found a front-on stock image of a standard coca-cola can and placed that image as a canvas onto Fusion360. Canvases can be calibrated by selecting points on the canvas and specifying a dimension, this allowed me to scale the image to the exact dimensions of the can. I then used the spline tool to trace around the irregular edges of the can to complete the cross-section. Then using the rotate tool, I created the 3D can body, and using the shell tool, hollowed out the inside of the can (2mm thickness).
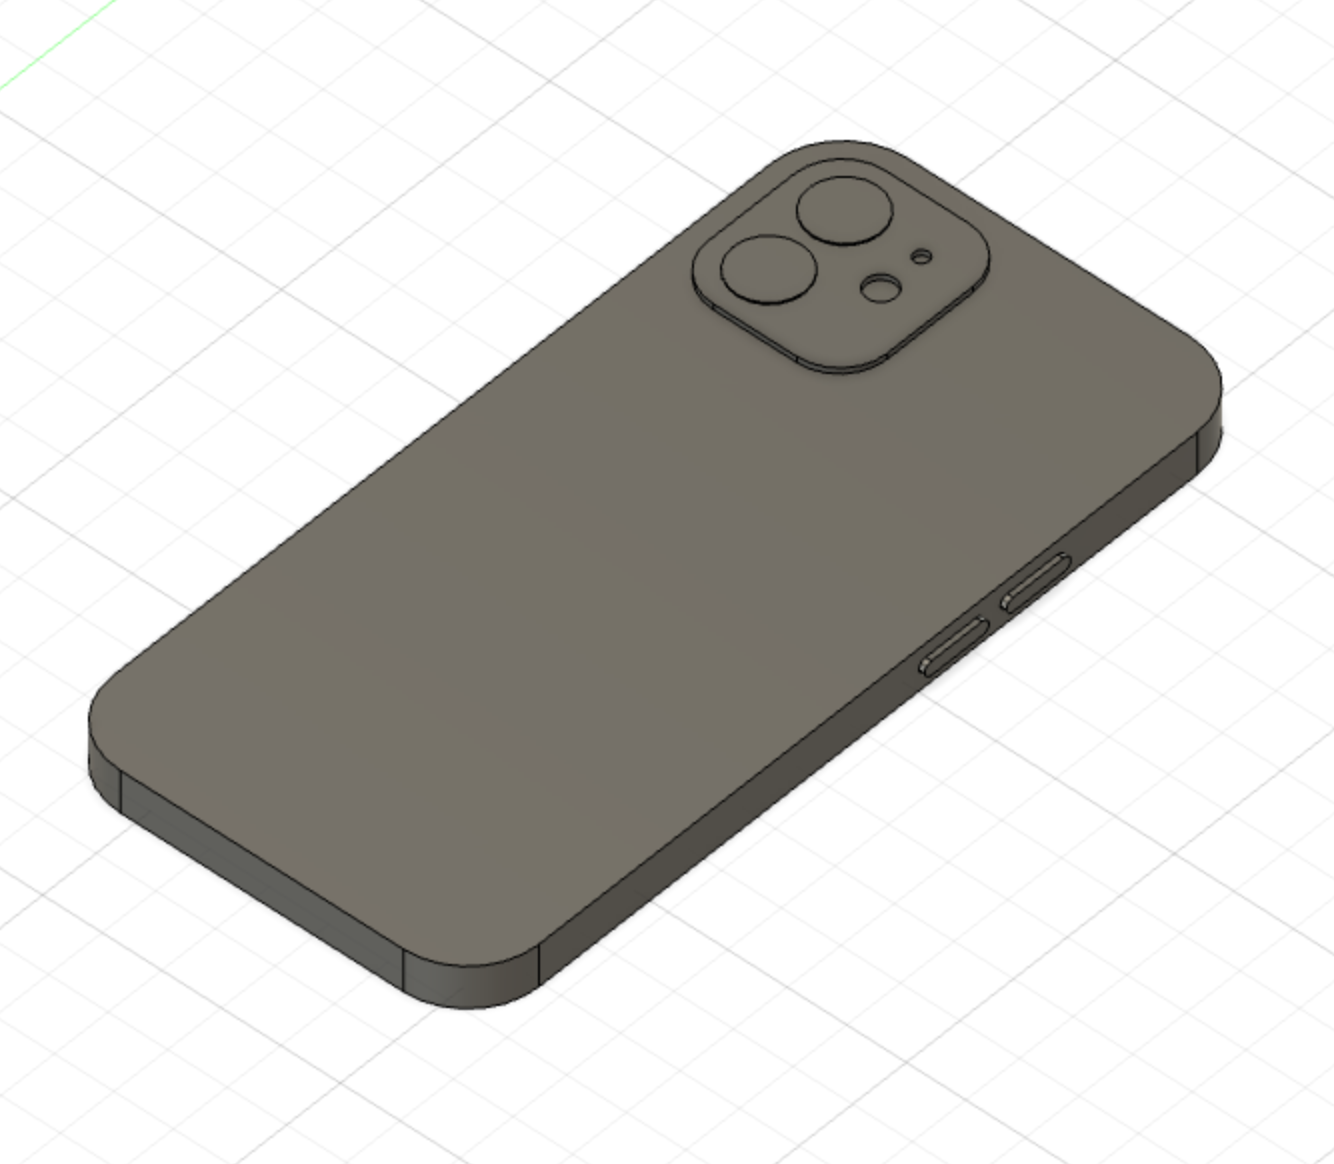
For the second household object, I chose to model my iPhone, it seemed complex enough for me to learn a few more Fusion360 tricks without being too complex. I measured the dimensions of my phone using calipers, which turned out to be 146x72x7.5mm, and also measured the camera bump and side volume buttons. The hardest part was to round off the corners using the fillet tool since it was hard to measure how ‘round’ the corners were. I ended up using a stock image of the iPhone, matched it to my model dimensions and choosing a fillet radius that matched the picture. I created a 2D model of the camera lenses, phone body and volume buttons, and used the extrude tool to create the 3D model.
Laser cutting
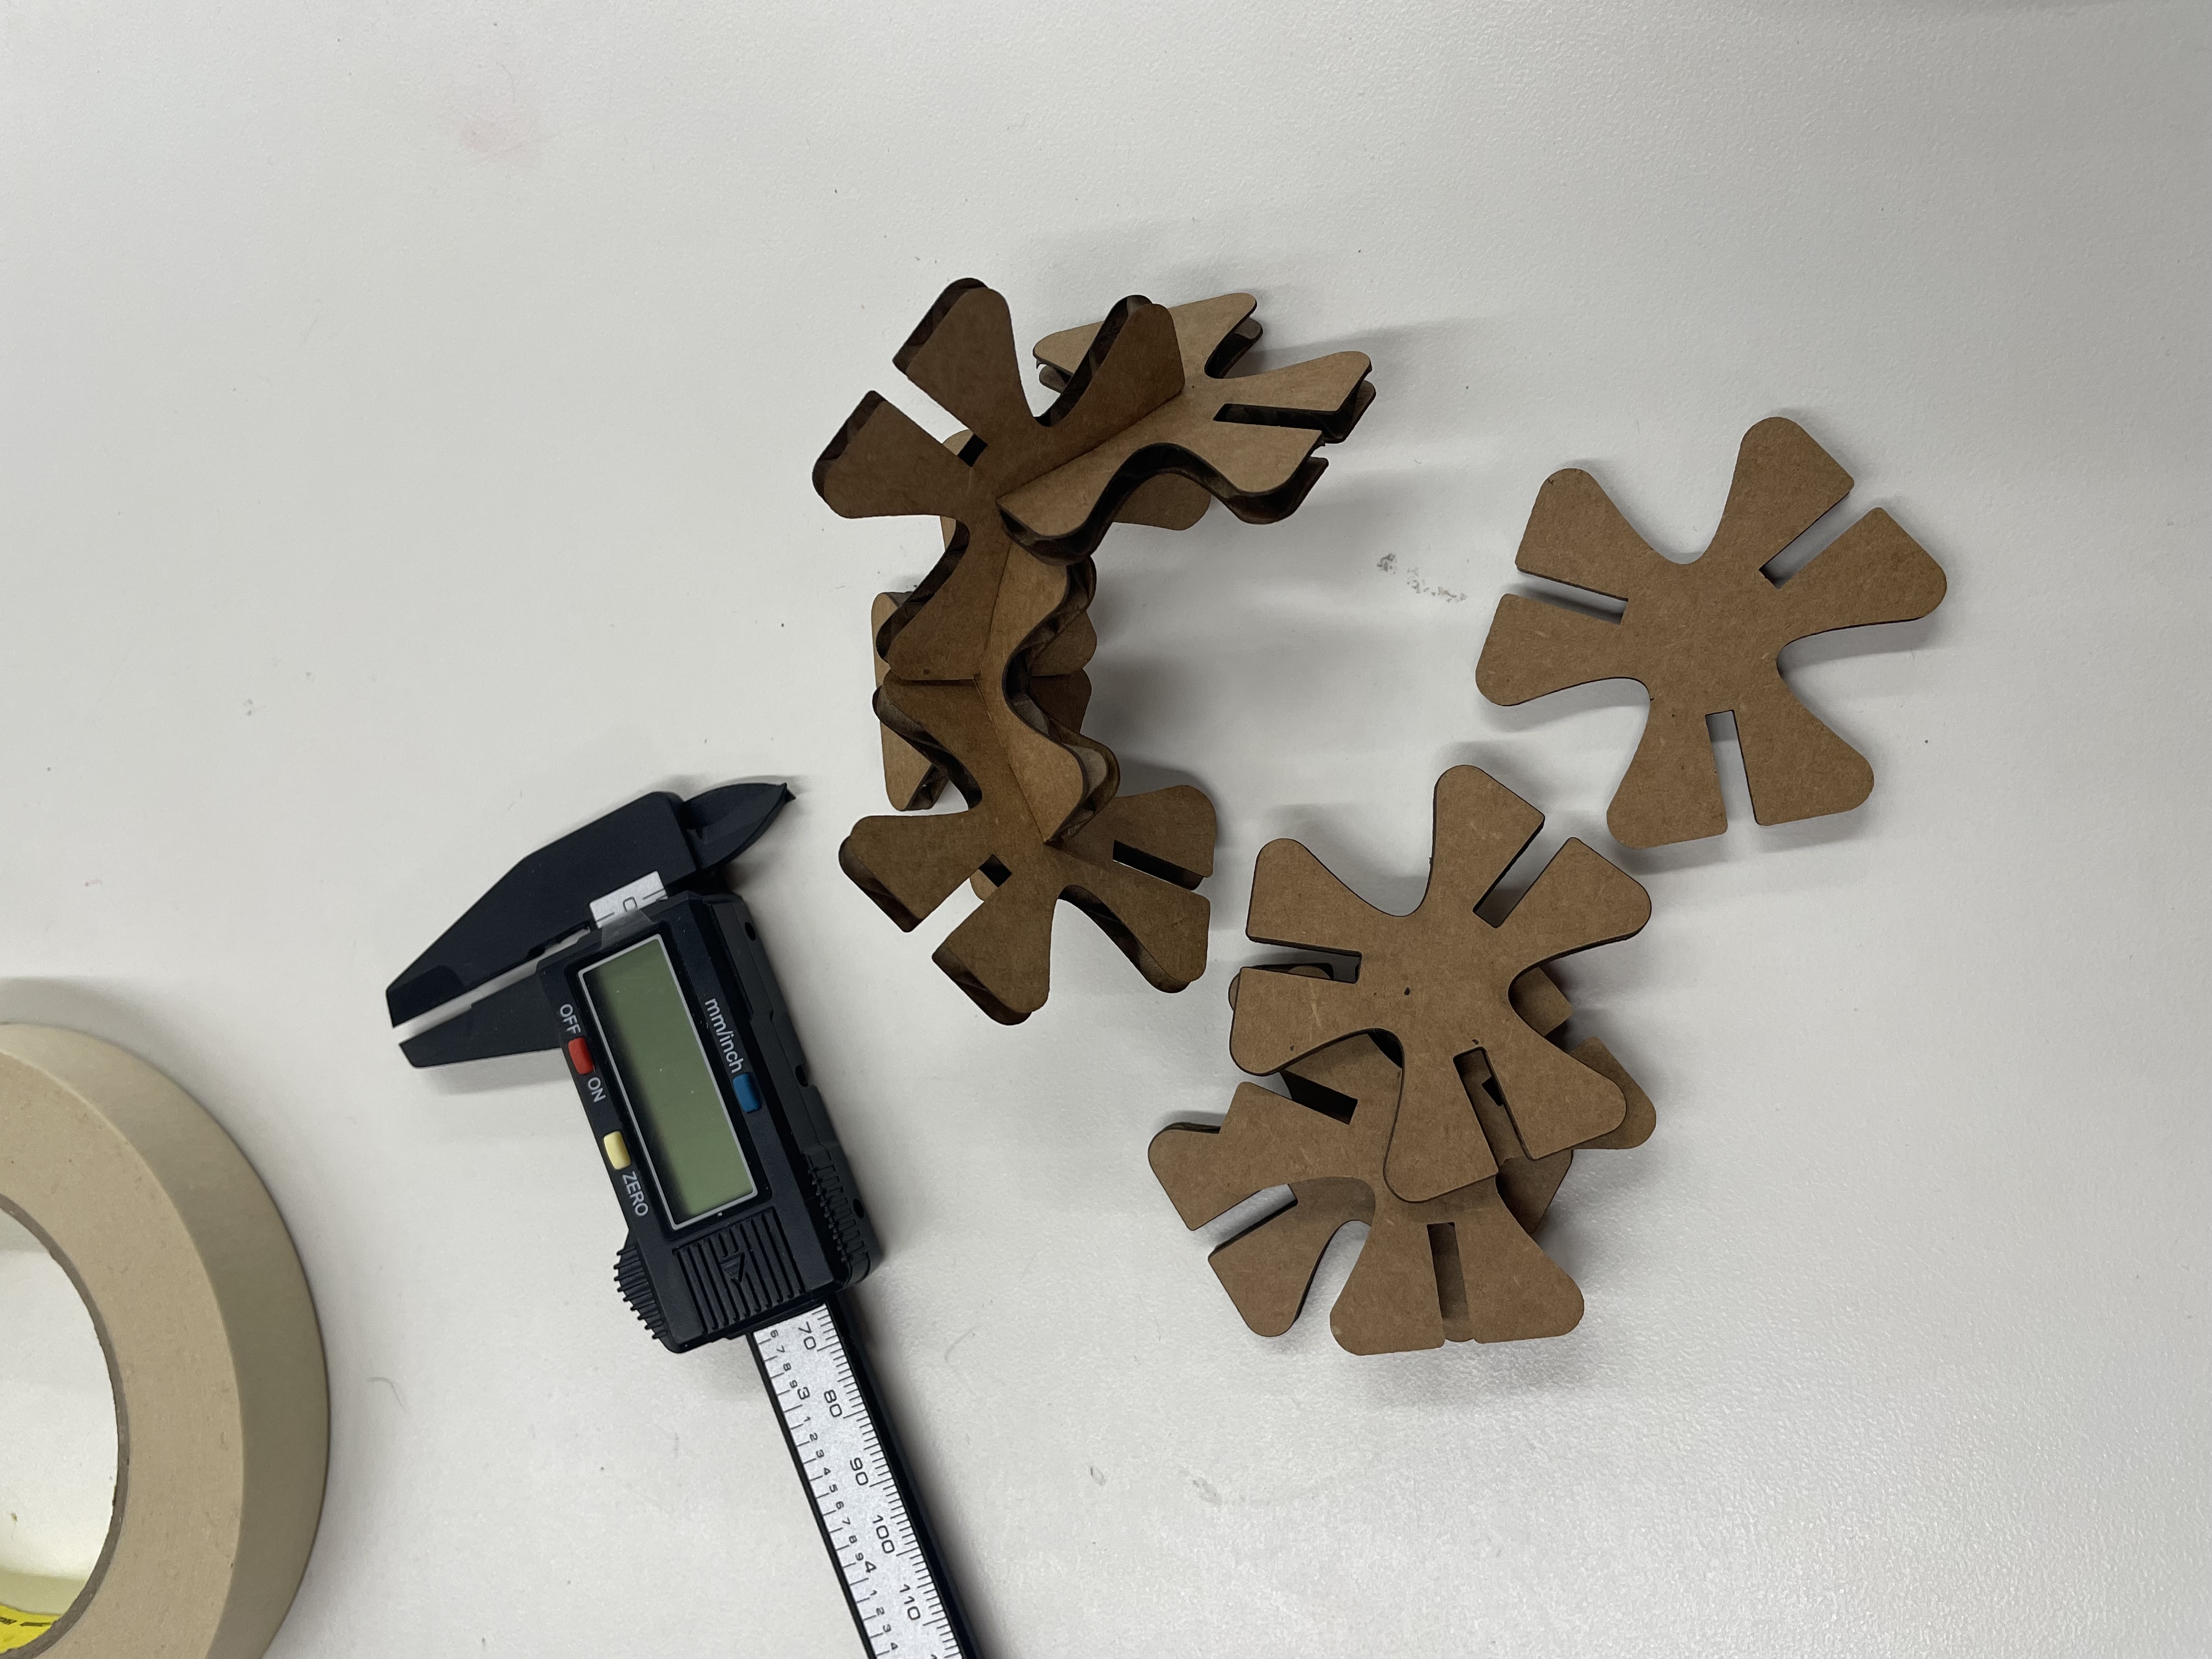
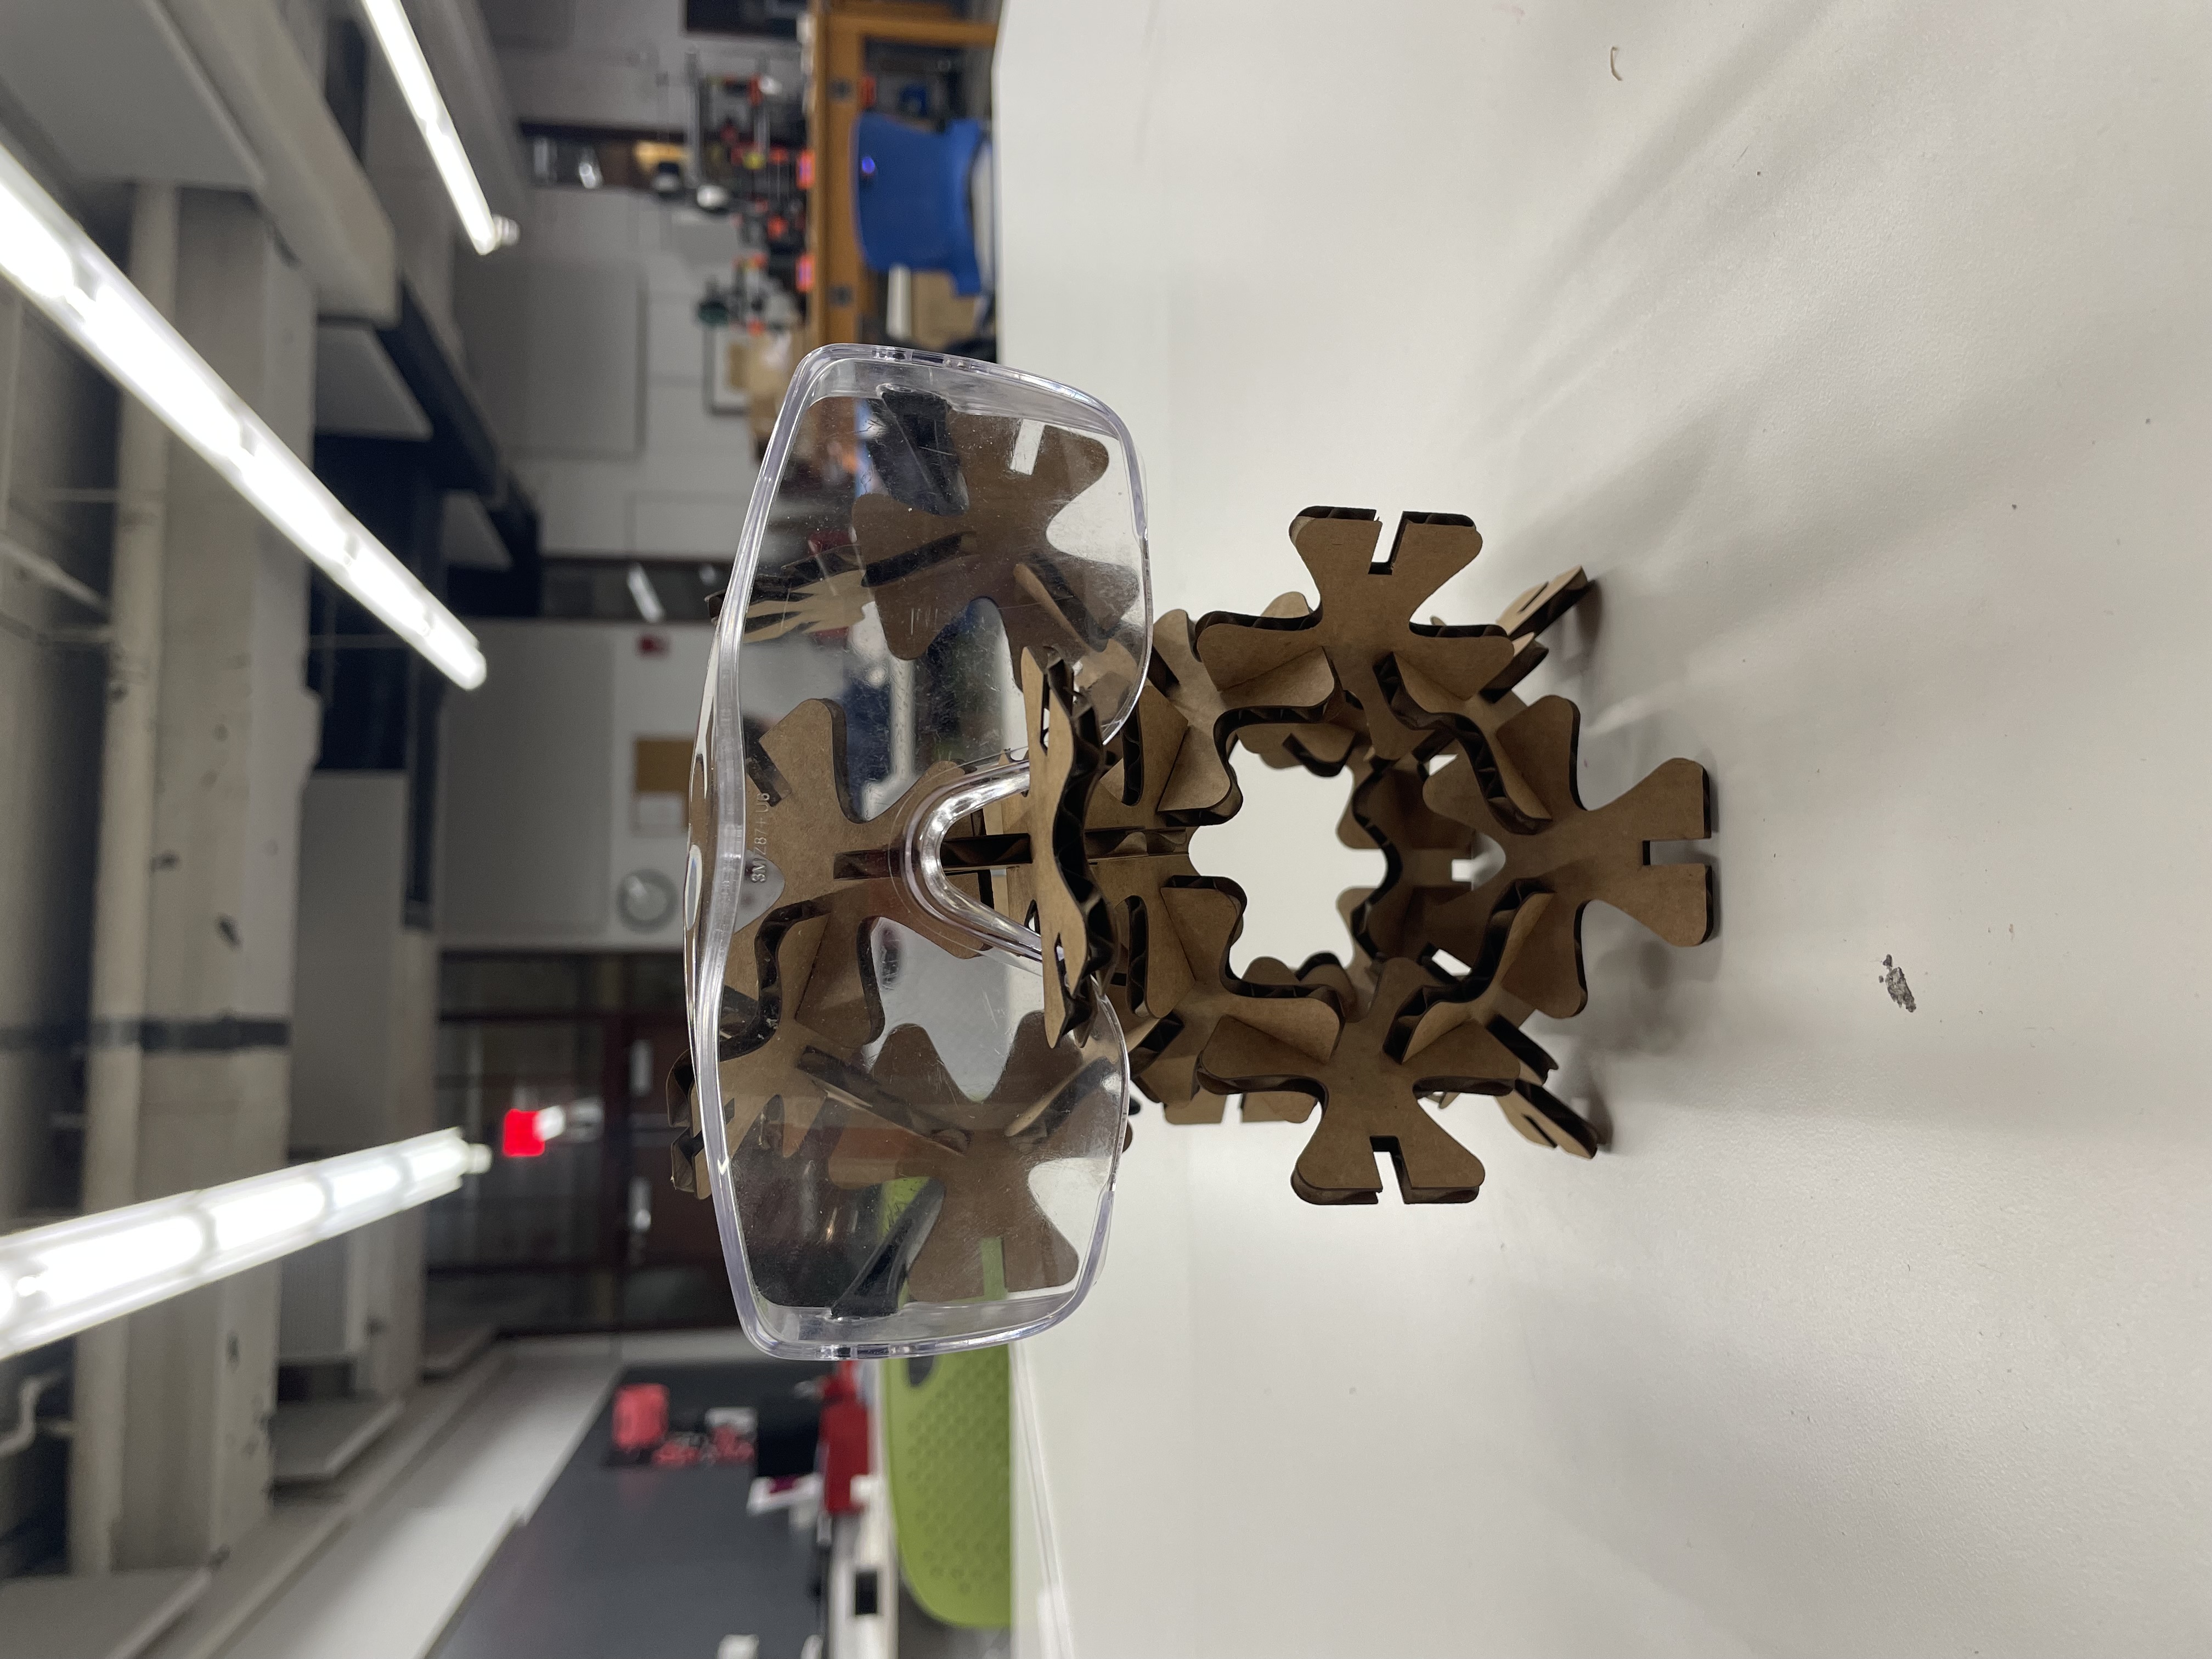
I was inspired by a clover, so I attempted to design a clover in Fusion360 for my press-fit kit. I started off with a rectangles that was 25x20mm and mirrored them along 60 and 120 degree lines to obtain a ‘shuriken-like’ object. Using the rectangle tool, I created a 4mm cutout so the object can fit into the other (4.1mm = thickness of cardboard minus kerf = 0.05mm per side). I then created triangles on each side of the rectangle 10mm by 25mm to create the leaves of the clover. I used the conic spline and fillet tools to round off the edges of the leaves which left me an object that resembled a clover.
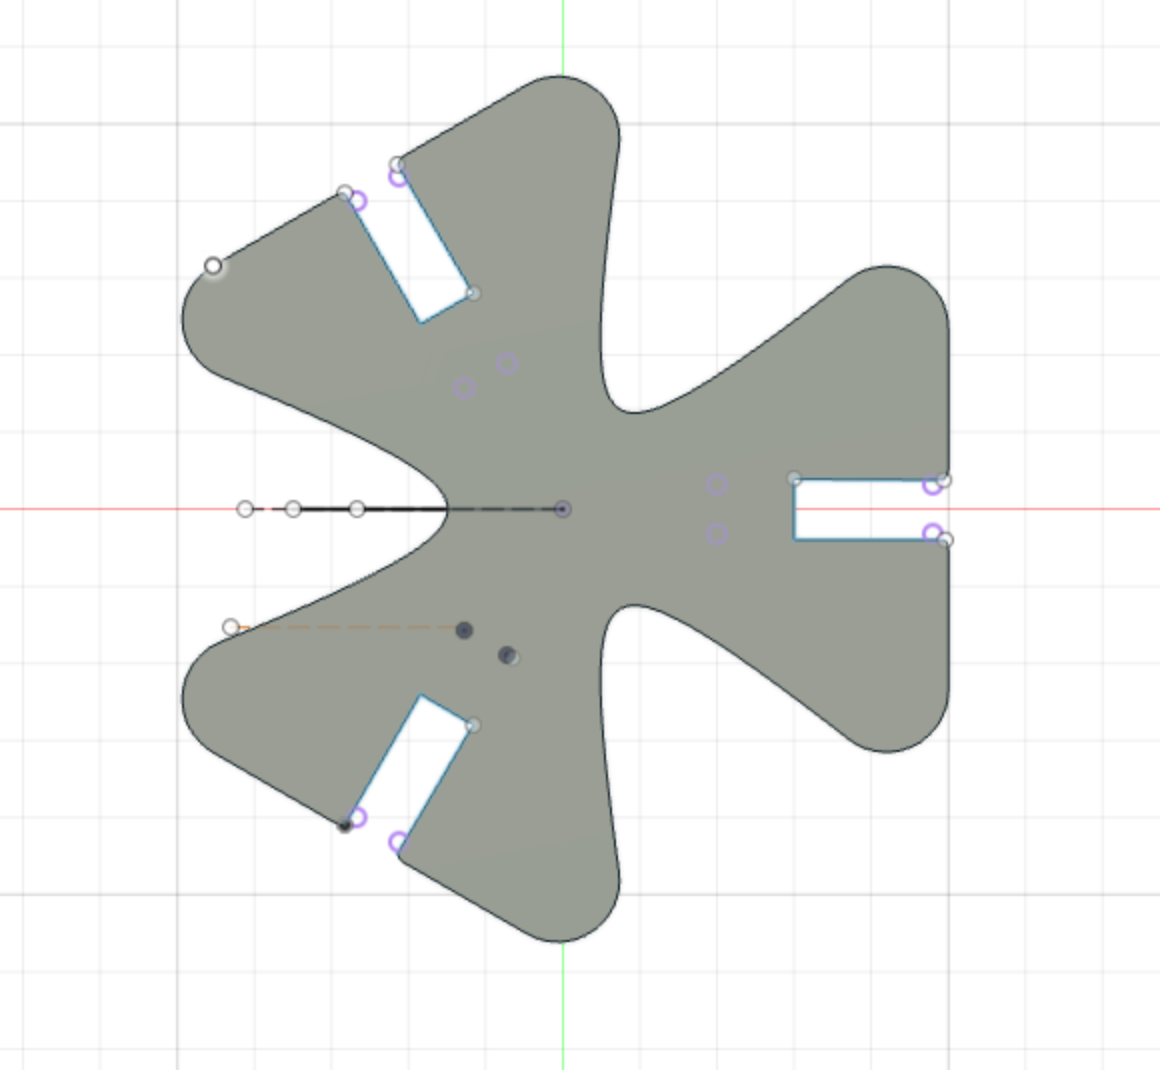
I initially had some issues with the kerf of the laser cutter, but through trial and error landed at the above settings.
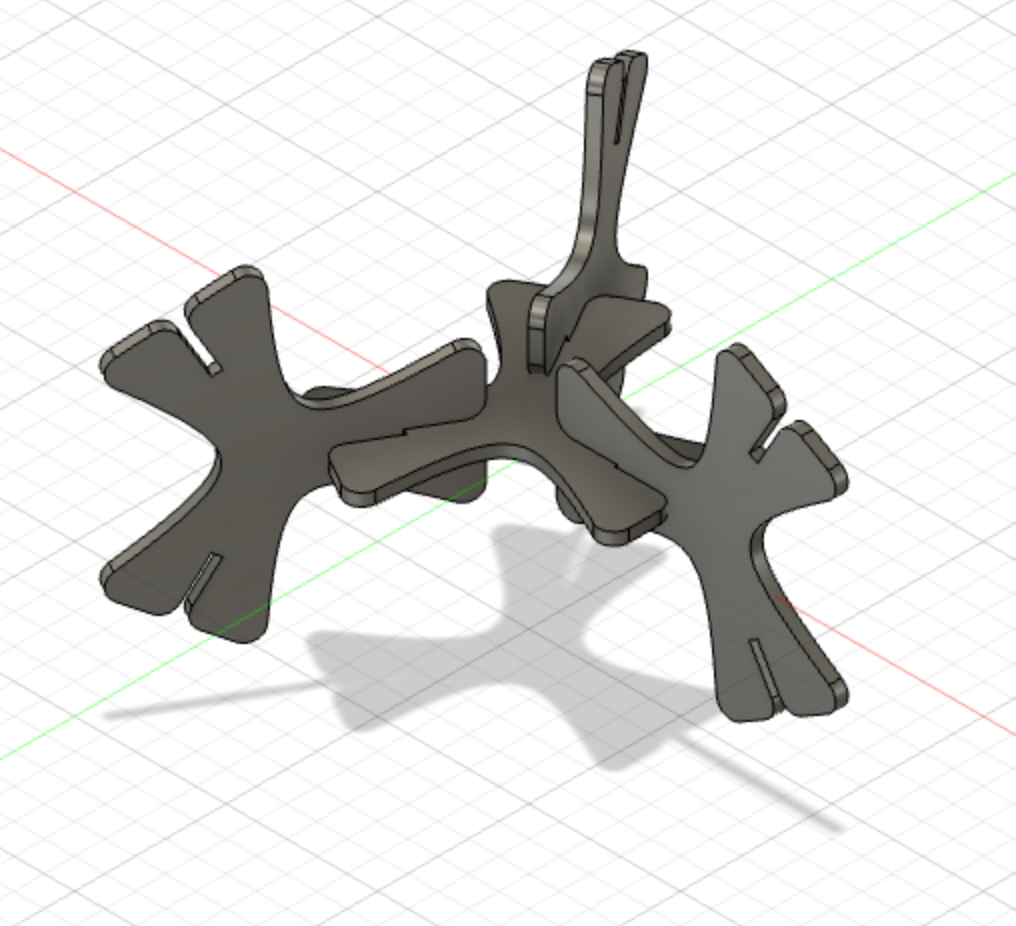
This is how it turned out